The Elixir ecosystem has a number of tools and third party packages to aid in keeping a code base in tip top shape. Setting up some code hygiene tools is one of the first things I do on any new project. In this series of posts we’ll go over the tools I typically use.
Updated 2022-06-06:
I noticed an interesting post on the Elixir Forum regarding the usage of GitHooks within a project. Reading it made me really rethink the way I’ve typically setup GitHooks on a project. It’s worked well in the past… but that was with a team of two where we had very similar dev workflows and it was easy to discuss changes to the way we wanted to structure any hooks.
As many of the posters in the above thread point out there can be legimate reasons to want to check in code that doesn’t compile or pass various checks. The most obvious being when you are stuck on something and want to check in some code so a team member can take a look. Another thing to consider is using GitHooks imposes a particular workflow on everyone and doesn’t make concessions for the different ways people work. In my current workplace they don’t have GitHooks set up for formatting, running test coverage etc. and I think that’s what I’ll be doing going forward as well. Leaving this kind of thing to a CI setup and handling outdated dependencies with Dependabot seems like a reasonable and flexible solution. So… you might want to consider ignoring the GitHook specific parts of these posts… with that caveat out of the way… back to our regularly scheduled program!
Create a sample project
We’ll create a sample project to demonstrate our code hygiene setup… so let’s create the project.
Terminal
mix phx.new code_hygiene
We’ll follow the instructions from the mix phx.new output and make sure everything seems to be running.
Terminal
cd code_hygiene
mix ecto.create
iex -S mix phx.server
Checking out http://localhost:4000/ everything looks as it should!

At this point I would typically make the first commit to the repo, i.e.
Terminal
git init
git add .
git commit -m "Initial commit"
Like many people, I use asdf as a version manager, so the next step I would take is to add a .tool-versions file to the project indicating which version of Elixir and Erlang the project is using, i.e.
Terminal
touch .tool-versions/.tool-versions
elixir 1.13.3
erlang 24.2.2
Again I would make a commit.
Terminal
git add .
git commit -m "Add tool verions"
And now we are ready to add some code hygiene!
Add code hygiene tools
I typically add the following to any new project:
- Credo - Credo provides static code analysis and flags up potential issues and refactoring opportunities. It’s a great tool and provides many useful insights.
- ExCoveralls - ExCoveralls provides code coverage statistics. I find it’s a great way to guard against forgetting to add tests for a new piece of functionality.
- ExDoc - this is the standard Elixir documentation generation tool.
- Dialyxir - provides static code analysis and validation of Typespecs; simplifies the use of Dialyzer in Elixir projects.
- Boundary - helps manage and restrain cross-module dependencies in Elixir projects.
- GitHooks - GitHooks let’s us run tasks prior to performing a Git action such as a
commitor apush. This is helpful in avoiding pushing code that doesn’t conform to the checks we’ve put in place. It also prevents pushing code that will just fail a CI pipeline (as part of this post we’ll set up some GitHub Actions to act as a CI pipeline).
Many of these tools are pretty unobtrusive (Credo, ExCoveralls, GitHooks and ExDoc) and I can’t see any reason to not include them when starting up a new project. Things are a little more open ended with Dialyxir and Boundary. Dialyzer can sometimes be a little flaky / annoying with Elixir projects, and for a small project Boundary might be overkill.
In anycase, let’s add the mix dependencies for the above tools.
/mix.exs
defp deps do
  [
    ...
    ...,
    {:credo, "~> 1.5", only: [:dev, :test], runtime: false},
    {:excoveralls, "~> 0.14", only: [:dev, :test], runtime: false},
    {:git_hooks, "~> 0.5", only: [:test, :dev], runtime: false},
    {:boundary, "~> 0.9.0", runtime: false},
    {:dialyxir, "~> 1.0", only: [:dev, :test], runtime: false},
    {:ex_doc, "~> 0.24", only: :dev, runtime: false}
  ]
end
… and grab the new dependencies…
Terminal
mix deps.get
We need to add some configuration for our newly added packages, so let’s take care of that next.
Configuration
Mix file
We need to make a few changes to the mix.exs file in order for ExCoveralls and Boundary to work.
We need to update the project definition to include Boundary in the compilers attribute and ExCoveralls requires us to add a test_coverage and preferred_cli_env section:
/mix.exs
...
def project do
  [
    ...,
    elixirc_paths: elixirc_paths(Mix.env()),
    # :boundary added to the below
    compilers: [:boundary, :gettext] ++ Mix.compilers(),
    start_permanent: Mix.env() == :prod,
    aliases: aliases(),
    deps: deps(),
    # the two ex_coveralls items
    test_coverage: [tool: ExCoveralls],
    preferred_cli_env: [
      coveralls: :test,
      "coveralls.detail": :test,
      "coveralls.post": :test,
      "coveralls.html": :test
    ]
  ]
end

...
Next let’s set up the Credo configuration.
Credo configuration
We’ll create a credo config file in the root of the project, this can be accomplished via:
Terminal
mix credo gen.configThis creates a .credo.exs file. There are a number of customizations that can be made to Credo in terms of what checks get performed (see the enabled and disabled section of the configuration file) and you can even make your own custom checks.
Typically I find the default settings are sufficient, the only change I usually make is to not check for TODO tags. You can either move this check into the disabled section of the configuration file, or set the check to false, i.e.
/.credo.exs
%{
  ...
  configs: [
    ...
    checks: %{
      enabled: [
      ...
      # If you don't want TODO comments to cause `mix credo` to fail, just
      # set this value to 0 (zero).
      #
      {Credo.Check.Design.TagTODO, false},
      ...
    ]
  ]
}
Note: setting the exit_status value to 0 as per the comment in the config file will still result in a warning when running mix credo --strict… which is why we are setting the check to false instead.
With the configuration set up let’s see what our credo checks reveal.
Terminal
mix credo --strict
Credo has flagged up some moduledoc warnings and some warnings related to test files. I usually disable checks on the test directory, so let’s do that by commenting out the test directory in the included files.
/.credo.exs
%{
  ...
  files: %{
  included: [
        "lib/",
        "src/",
        # "test/",
        "web/",
        "apps/*/lib/",
        "apps/*/src/",
        "apps/*/test/",
        "apps/*/web/"
      ],
  }
}
For the moduledoc warnings we’ll add a @moduledoc false attribute to the flagged modules as we don’t care about adding moduledocs for these particular files.
/lib/code_hygiene_web/telemetry.ex
defmodule CodeHygieneWeb.Telemetry do
  @moduledoc false
  ...
/lib/code_hygiene/mailer.ex
defmodule CodeHygiene.Mailer do
  @moduledoc false
  ...
Now if we run credo again?
Terminal
mix credo --strict
All good!
Time to cofigure ExCoveralls.
Coveralls configuration
Although not necessary, I find a custom coveralls.json file is useful when using ExCoveralls.
Terminal
touch coveralls.jsonIn the configuration we’ll skip files we don’t want included in our coverage statistics such as our test files and some of the default files generated when a new Phoenix project is created.
/coveralls.json
{
  "skip_files": [
    "test",
    "lib/code_hygiene/application.ex",
    "lib/code_hygiene_web.ex",
    "lib/code_hygiene_web/router.ex",
    "lib/code_hygiene_web/telemetry.ex",
    "lib/code_hygiene_web/views/error_helpers.ex"
  ],

  "terminal_options": {
    "file_column_width": 80
  },

  "coverage_options": {
    "treat_no_relevant_lines_as_covered": true,
    "minimum_coverage": 100
  }
}
We’ve also set our minimum_coverage value to 100. This is something I’ve been experimenting with. Having 100% coverage certainly does not indicate bug free code, nor is it necessarily desirable. The way I’ve been using this is to not actually enforce 100% coverage but to force any coverage gaps to be very intentional via the ignore line comments provided by excoveralls that you can place directly into your code files, i.e.
This means I need to explicitly indicate something isn’t covered by a test. I’m still undecided on whether I like this approach or not… and it certainly might not be the right one for you.
In anycase, let’s see what coveralls has to tell us.
Terminal
mix coveralls
All good! Let’s look at Boundary next.
Boundary setup
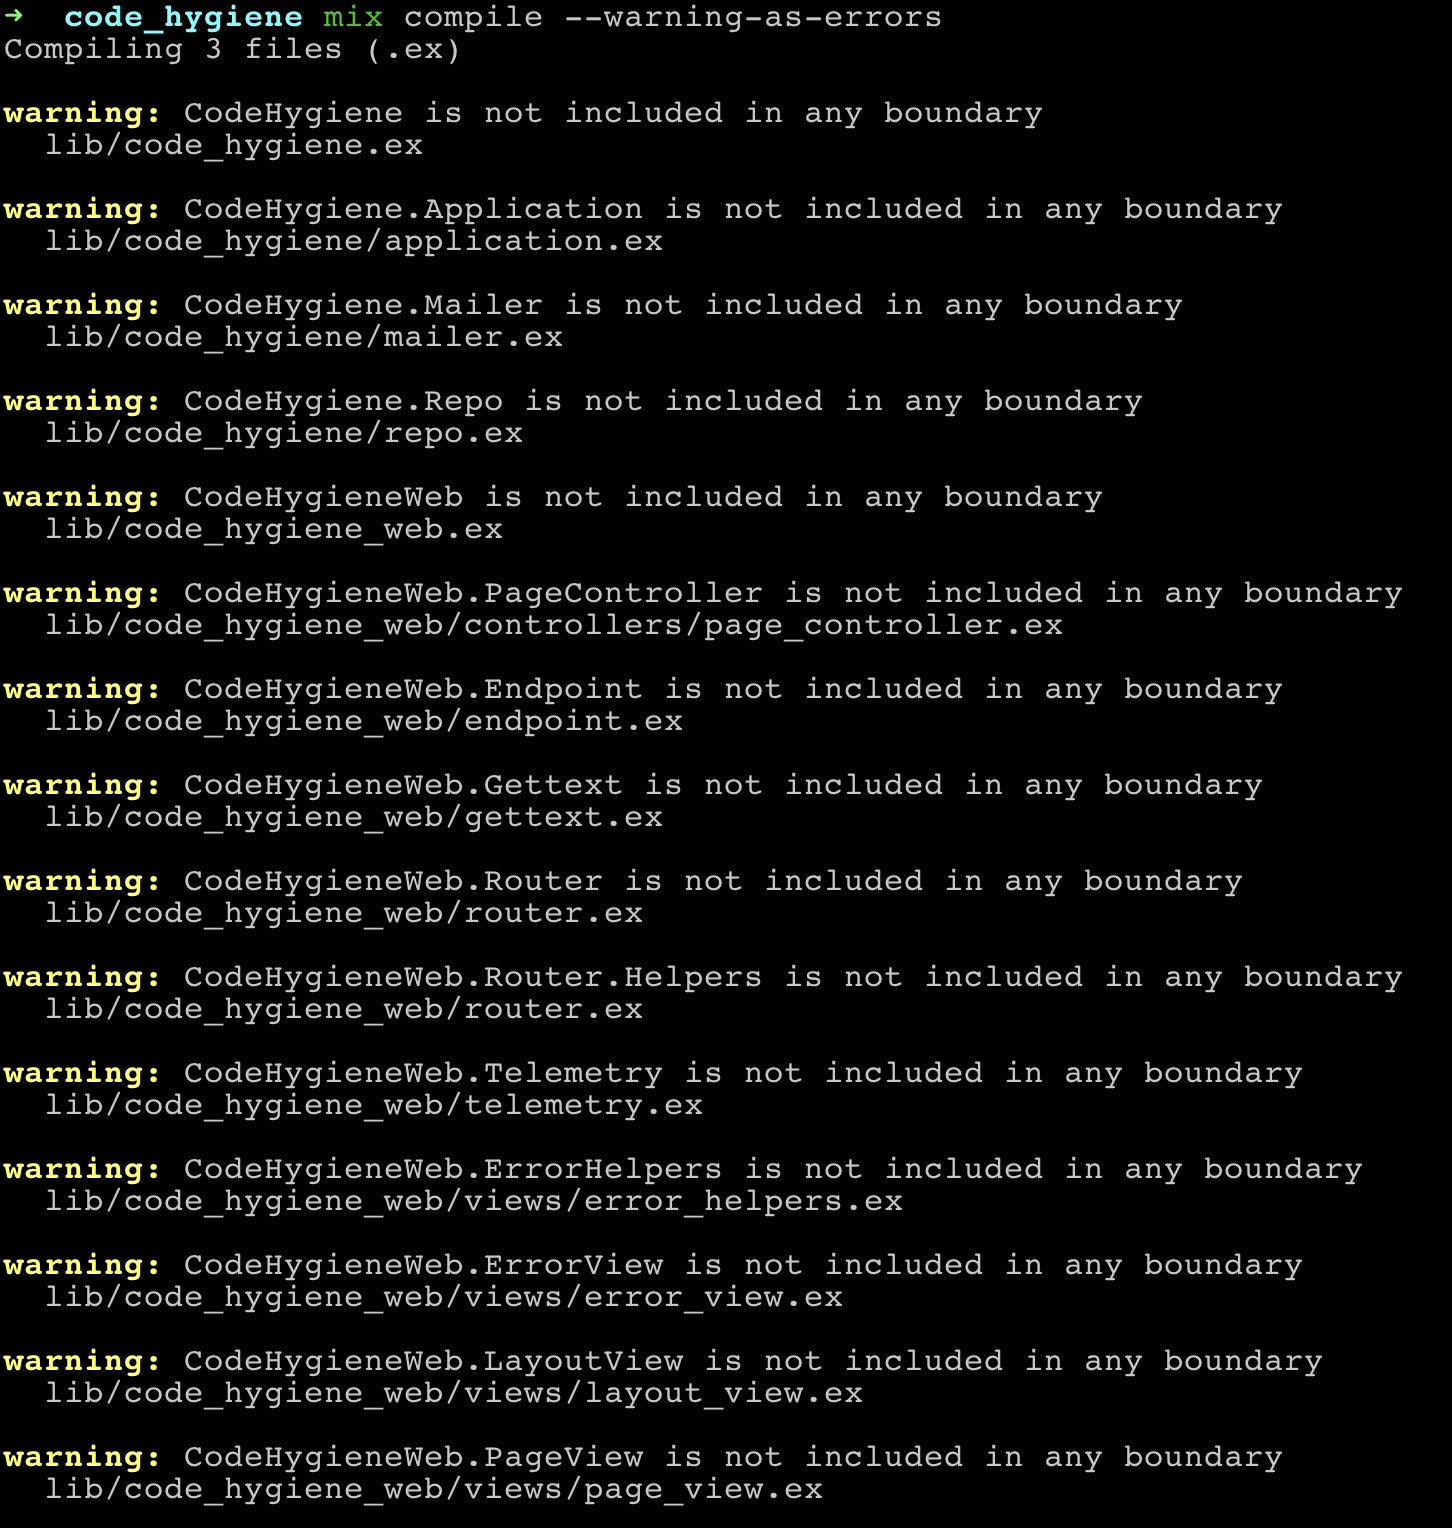
We’ll go into a more detailed set up of Boundary in our next post so don’t worry if the below seems a little nebulous; today we’ll just get things set up with no Boundary warnings. If we compile the project as it stands, we’ll see we’re not there yet!
Terminal
mix compile --warning-as-errors
To clear these up we need to add a few boundary statements throughout the code.
/lib/code_hygiene.ex
defmodule CodeHygiene do
  @moduledoc """
  CodeHygiene keeps the contexts that define your domain
  and business logic.

  Contexts are also responsible for managing your data, regardless
  if it comes from the database, an external API or others.
  """
  use Boundary
end
Adding the above use statement establishes our main backend code_hygiene.ex module as a boundary.
Now we need to deal with the web layer.
/lib/code_hygiene_web.ex
defmodule CodeHygieneWeb do
  @moduledoc """
  The entrypoint for defining your web interface, such
  as controllers, views, channels and so on.

  This can be used in your application as:

      use CodeHygieneWeb, :controller
      use CodeHygieneWeb, :view

  The definitions below will be executed for every view,
  controller, etc, so keep them short and clean, focused
  on imports, uses and aliases.

  Do NOT define functions inside the quoted expressions
  below. Instead, define any helper function in modules
  and import those modules here.
  """

  use Boundary, deps: [CodeHygiene], exports: [Endpoint]
  ...
Here we are establishing code_hygiene_web.ex as another boundary. We’re also specifying CodeHygieneWeb can access our main backend module; CodeHygiene (via the deps attribute); and we export the Endpoint module via the exports attribute.
Finally we need to update application.ex and indicate it is a top level boundary. It depends on both the CodeHygiene and CodeHygieneWeb boundaries. You’ll notice that application.ex references endpoint.ex, thus why we needed to export it in our code_hygiene_web.ex boundary configuration.
/lib/code_hygiene/application.ex
defmodule CodeHygiene.Application do
  # See https://hexdocs.pm/elixir/Application.html
  # for more information on OTP Applications
  @moduledoc false

  use Application

  use Boundary, top_level?: true, deps: [CodeHygiene, CodeHygieneWeb]

  @impl true
  def start(_type, _args) do
  ...
  ...
In practical terms the above boundary setup means we can access any function in code_hygiene.ex from our Web layer. Essentially we are setting up code_hygiene.ex as our core backend API which all our web requests to the backend will go thru. Again we’ll go over this more in the next post.
For now, let’s see what happens if we compile the project again.
Terminal
mix clean
mix compile --warning-as-errors
Looking good!
ExDoc configuration
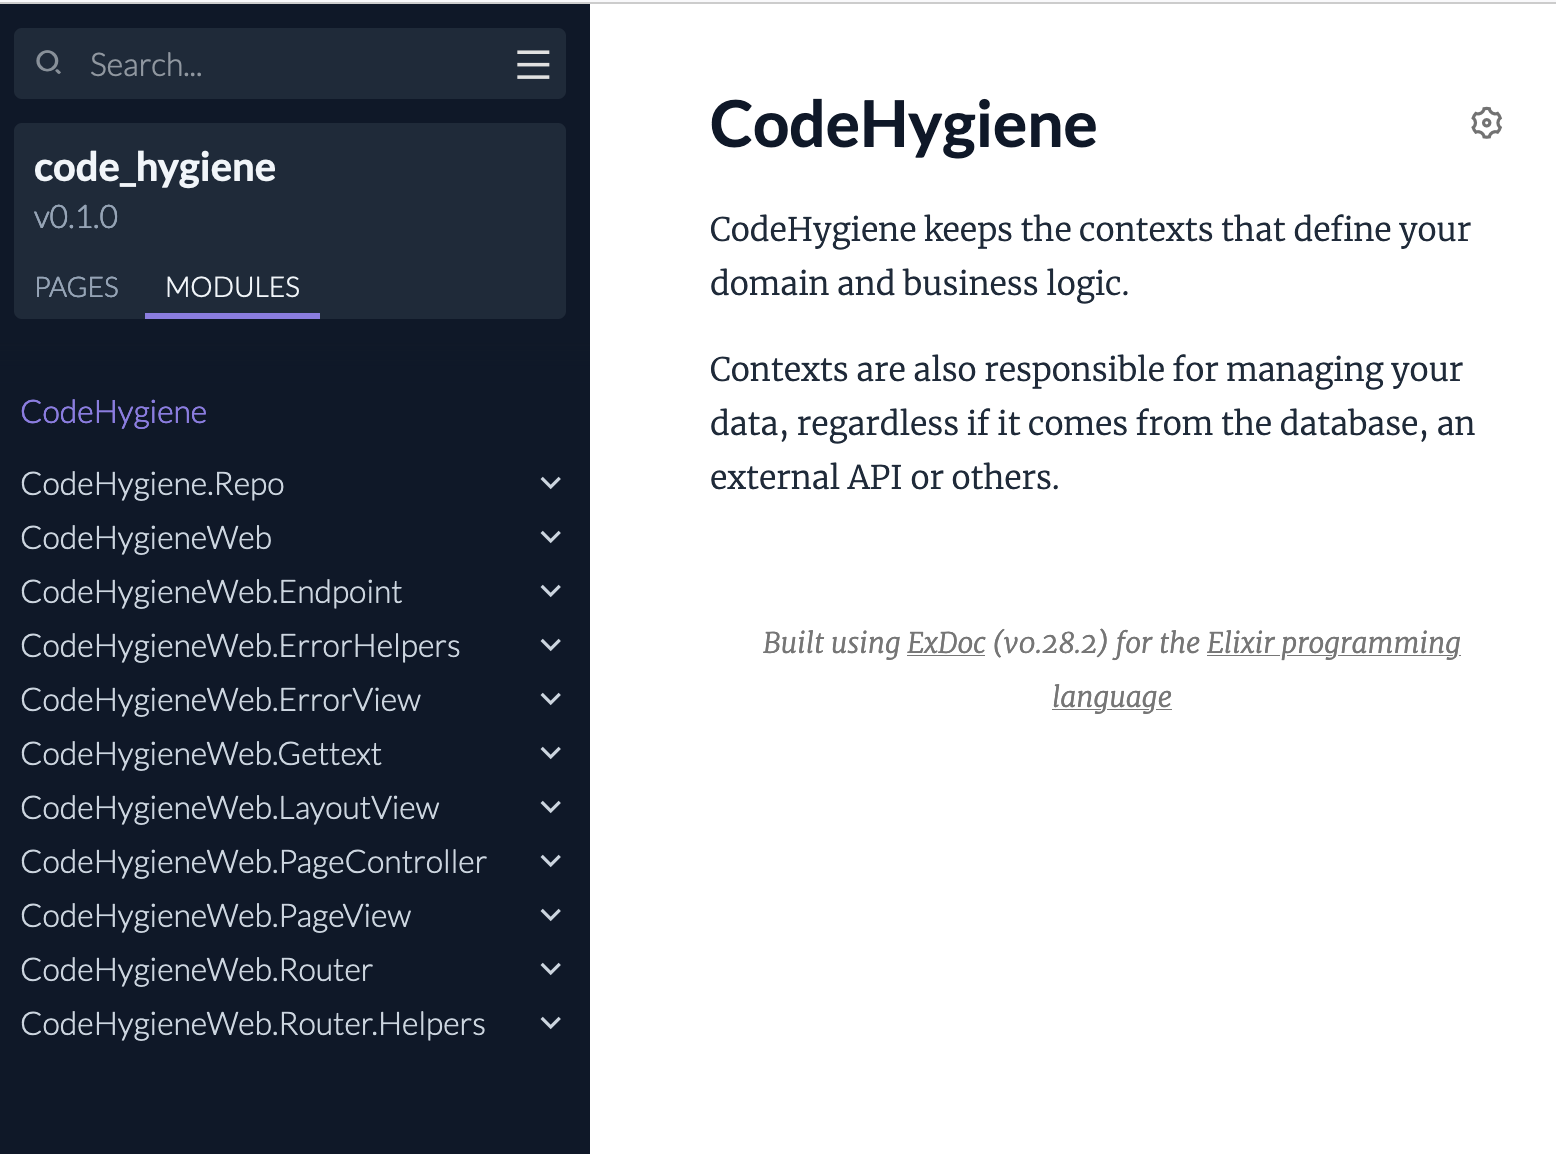
We’re going to leave our ExDoc setup to a subsequent post where we’ll customize the output a little bit. You can generate documents right out the box however without any special configuration via:
Terminal
mix docs
Terminal
open doc/index.htmlIf you navigate to the Modules tab you’ll see documentation for the various modules in our project.

Our final bit of configuration for the day is getting GitHooks setup.
GitHooks configuration
We don’t need a specific configuration file for GitHooks, instead we just need to enhance our existing config.exs file. We’ll add the GitHooks configuration directly after the Jason configuration.
/config/config.exs
...
...
# Use Jason for JSON parsing in Phoenix
config :phoenix, :json_library, Jason

# git hooks configuration
if Mix.env() != :prod do
  config :git_hooks,
    verbose: true,
    hooks: [
      pre_commit: [
        tasks: [
          {:cmd, "mix compile --warnings-as-errors"},
          {:cmd, "mix format --check-formatted"},
          {:cmd, "mix credo --strict"}
        ]
      ],
      pre_push: [
        tasks: [
          {:cmd, "mix clean"},
          {:cmd, "mix hex.outdated"},
          {:cmd, "mix compile --warnings-as-errors"},
          {:cmd, "mix format --check-formatted"},
          {:cmd, "mix credo --strict"},
          {:cmd, "mix coveralls"},
          {:cmd, "mix dialyzer"},
          {:cmd, "mix docs"}
        ]
      ]
    ]
end

# Import environment specific config. This must remain at the bottom
...
We’re adding some hooks that will run before we commit and also before we push. Commits will fail if the compiler, formatter or credo pop any errors or warnings. On a push we do the same checks but add in a coveralls check and also a check for outdated dependencies, dialyzer errors and doc errors.
The outdated dependency check (i.e. hex.outdated) is something you might not want to include, and you will definitely want to discuss this with your team so they don’t murder you. This dependency check can be pretty annoying as it prevents a check-in when a dependency falls out of date. Similar to the 100% coverage setting in ExCoveralls, this is something I am experimenting with and haven’t reached a definitive conclusion as to whether I like it or not. It is certainly something that you wouldn’t want around once a project becomes more mature and is deployed. When a project is first getting started I kind of like having the check, as it keeps everything completely up to date.
Anyway, let’s ensure the hook are working, we can run them locally as below.
Terminal
mix git_hooks.run pre_commit
All good, next we’ll try the push hooks (Note: this will take a bit of time as the first run of dialyzer is somewhat snail like… subsequent runs are faster).
Terminal
mix git_hooks.run pre_pushWhile writing this post I ran into an example of the hex.outdated check, we can see credo has an update available and thus an attempt to push our code would fail.

We would resolve this by updating credo.
Terminal
mix deps.update credoAnd now all is good.
Terminal
mix git_hooks.run pre_push
Again, you’ll want to really think about whether you want hex.outdated included as part of your checks.
A mix task to check… all the things
Finally, I like to add a mix task as a convenience to run all the hygiene checks. We’ll make another update to mix.exs, adding a new alias.
/mix.exs
defp aliases do
  [
    ...
    "assets.deploy": ["esbuild default --minify", "phx.digest"],
    check: ["format", "credo --strict", "compile --warnings-as-errors", "dialyzer", "docs"]
  ]
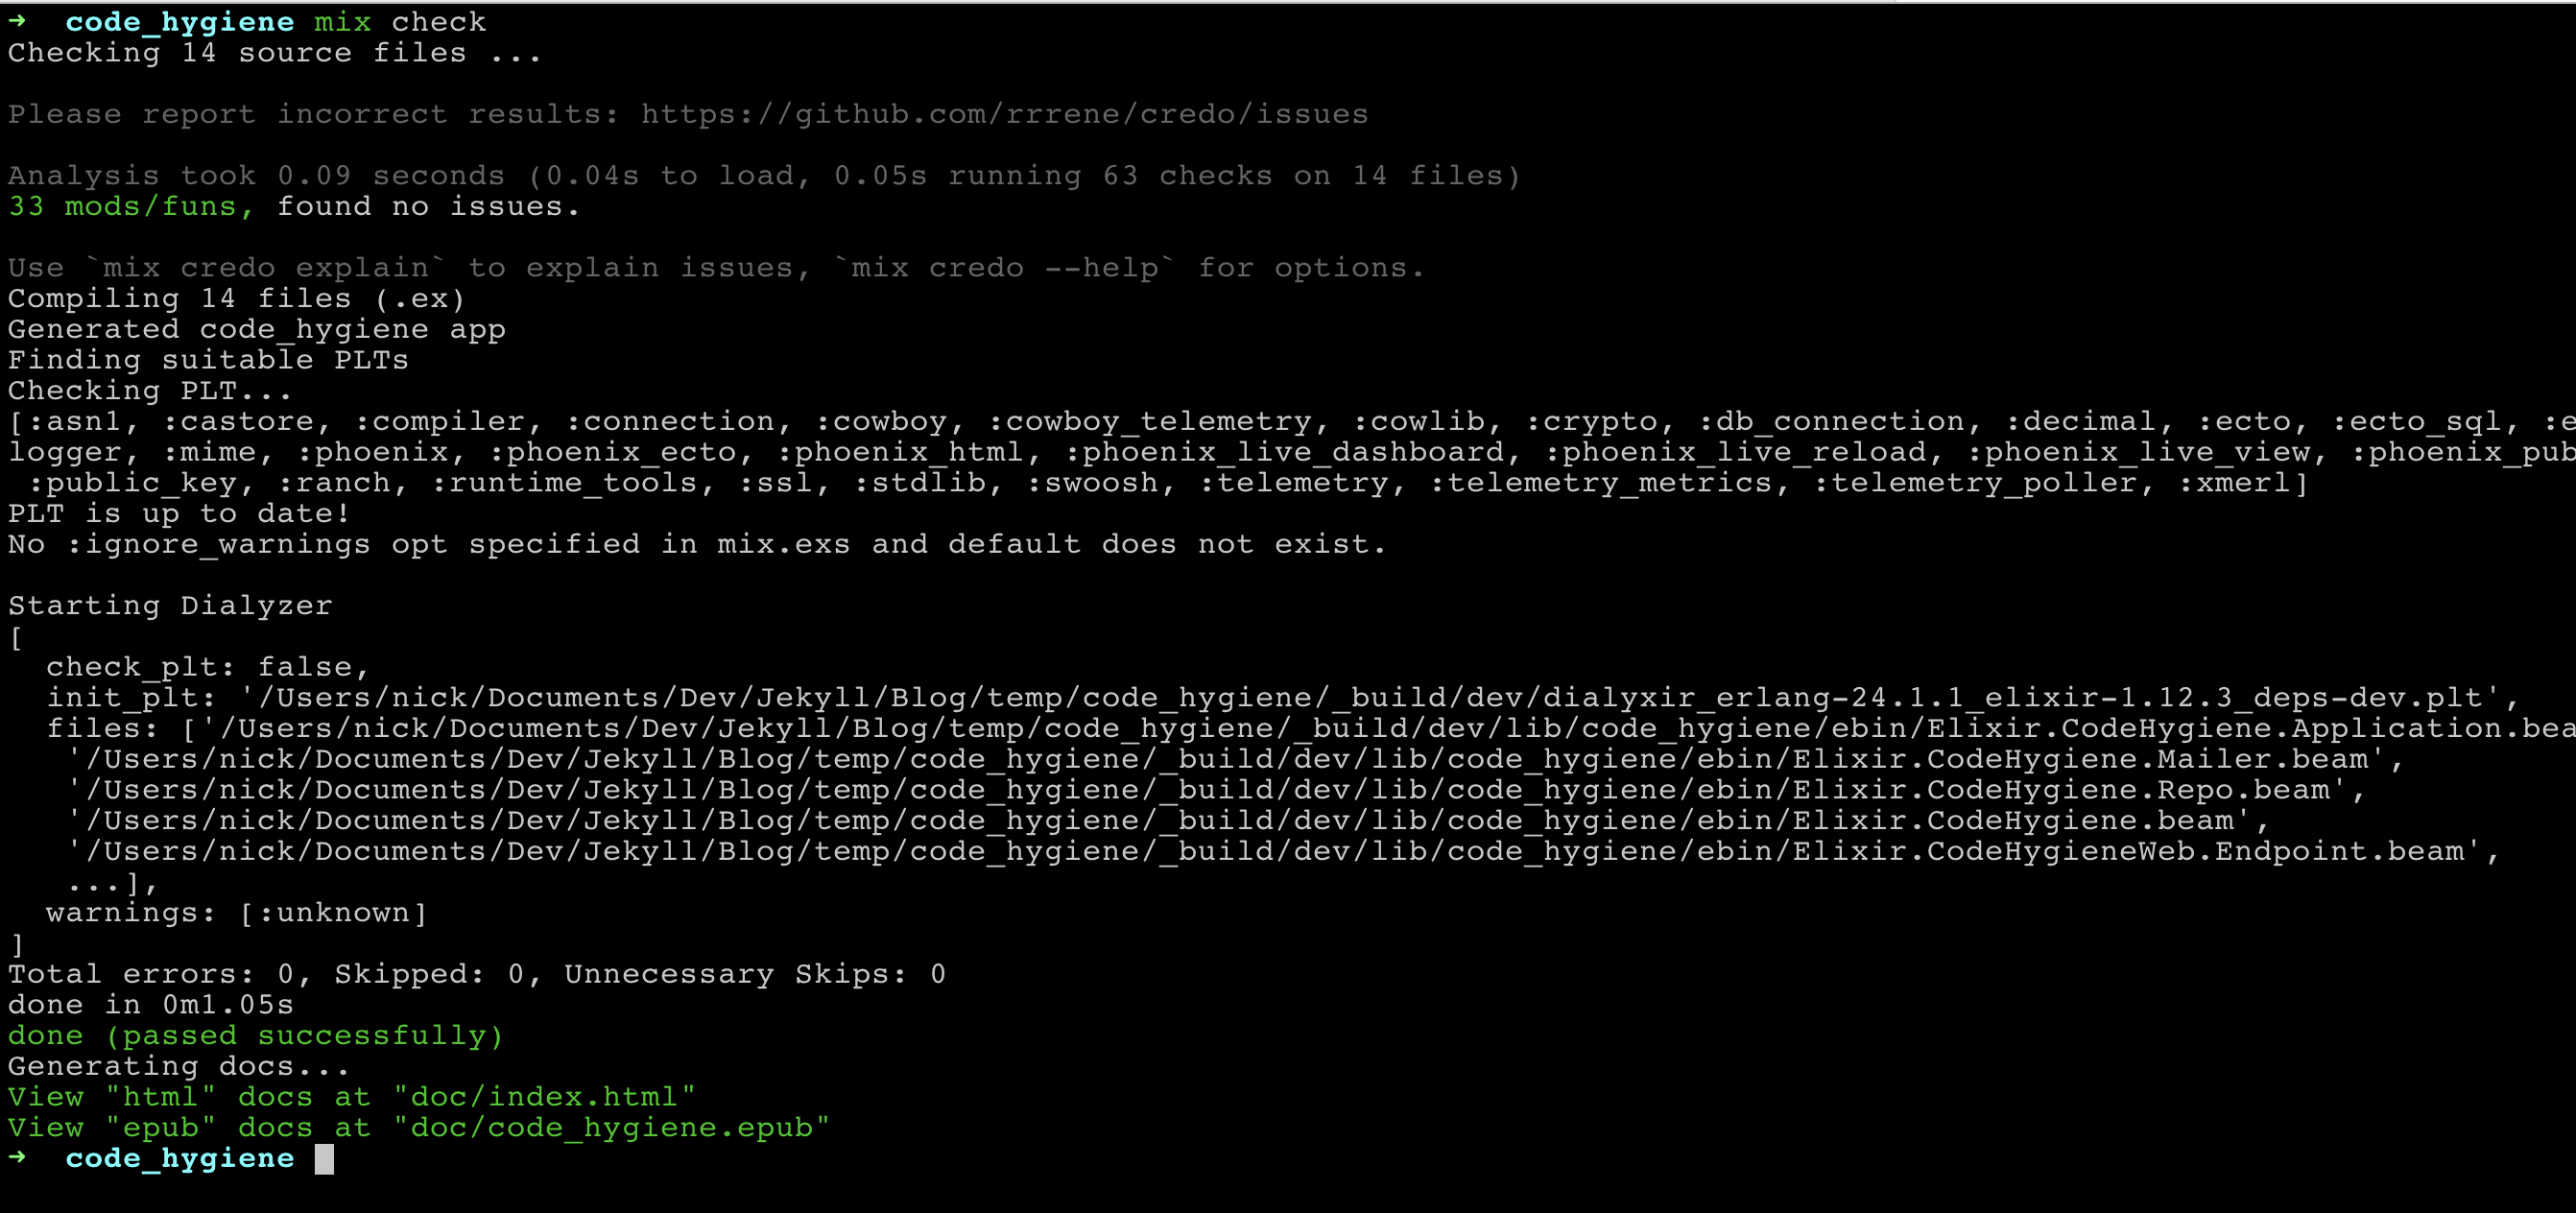
This way we can just run mix check from the terminal.
Terminal
mix check
All good, one more thing before we’re done… let’s add some GitHub Actions to run our checks when we push our code.
Before proceeding I’d tend to do a commit.
Terminal
git add .
git commit -m "Add code hygiene tools"
… and now let’s get to those actions!
GitHub actions
Compile, test, lint etc.
We need to add a new YAML file for the workflow in a .github/workflows directory. We’ll name the file build_lint_test.yml… ‘cause well that’s what it does.
Terminal
mkdir -p .github/workflows
touch .github/workflows/build_lint_test.yml
This file is largely based on the examples from the setup-beam repository.
/.github/workflows/build_lint_test.yml
name: Build, lint and test
on: [push]
env:
  MIX_ENV: test
jobs:
  build:
    name: Build, lint and test
    runs-on: ubuntu-latest
    services:
      db:
        image: postgres:11
        ports: ["5432:5432"]
        env:
          POSTGRES_PASSWORD: postgres
        options: >-
          --health-cmd pg_isready
          --health-interval 10s
          --health-timeout 5s
          --health-retries 5
    steps:
      - uses: actions/checkout@v2
      - name: Set up Elixir
        uses: erlef/setup-beam@v1
        with:
          elixir-version: "1.13.3"
          otp-version: "24.2"
      - name: Restore dependencies cache
        uses: actions/cache@v2
        with:
          path: deps
          key: ${{ runner.os }}-mix-${{ hashFiles('**/mix.lock') }}
          restore-keys: $-mix-
      - name: Install dependencies
        run: mix deps.get
      - name: Check for outdated deps
        run: mix hex.outdated
      - name: Compile
        run: |
          MIX_ENV=prod mix compile --warnings-as-errors
          MIX_ENV=test mix compile --warnings-as-errors
          MIX_ENV=dev mix compile --warnings-as-errors
      - name: Lint
        run: mix format --check-formatted
      - name: Credo
        run: mix credo --strict
      - name: Run tests
        run: |
          mix ecto.create
          mix ecto.migrate
          mix coveralls
So what’s going on here?
On any push to GitHub we’ll compile, check for outdated deps (again just like with the GitHooks this is something you might not want to do) lint, run credo, and finally run our tests via coveralls. If any of these steps fail, we’ll get a notification from GitHub to indicate our push caused errors… nice!
We have GitHooks running locally, so in theory we should never hit a situation where the GitHub action fails… we’d expect the push to GitHub itself to fail locally. However, I think it’s very beneficial having these checks as part of the CI process. You don’t want to depend on local dev setups to enforce your project’s code hygiene.
We’ll also create a workflow for running Dialyzer, we’ll only run it on the main branch since it can be a little slow.
Terminal
touch .github/workflows/dialyzer.ymlDialyzer
/.github/workflows/dialyzer.yml
name: Dialyzer
on:
  push:
    branches:
      - main
jobs:
  dialyzer:
    name: Run Dialyzer for type checking
    runs-on: ubuntu-latest
    steps:
      - uses: actions/checkout@v2
      - name: Set mix file hash
        id: set_vars
        run: |
          mix_hash="${{ hashFiles(format('{0}{1}', github.workspace, '/mix.lock')) }}"
          echo "::set-output name=mix_hash::$mix_hash"
      - name: Cache PLT files
        id: cache-plt
        uses: actions/cache@v2
        with:
          path: |
            _build/dev/*.plt
            _build/dev/*.plt.hash
          key: plt-cache-${{ steps.set_vars.outputs.mix_hash }}
          restore-keys: |
            plt-cache-
      - name: Run Dialyzer
        uses: erlef/setup-elixir@v1
        with:
          elixir-version: "1.13.3"
          otp-version: "24.2"
      - run: mix deps.get
      - run: mix dialyzer
This is a pretty simple workflow, I believe I originally sourced this from the excellent post by Trevor Brown. I’d recommend checking out his post for a more detailed explanation of this workflow.
In a subsequent post we’ll also add a GitHub action to generate our docs… but for today we’re done and dusted. Let’s check in these changes.
Terminal
git add .
git commit -m "Add GH actions"
Now if we set up a repo in GitHub and push our code, we’ll see our workflows run… and hopefully succeed!
Terminal
git remote add origin <yer github repo url>
git branch -M main
git push -u origin main
Very nice!
Summary
So that’s it for today, next time out we’ll take a closer look at Boundary and get a better idea of the benefits it provides.
Today’s code
If you want to retrieve the GitHub commit that corresponds to today’s code:
Terminal
mkdir <some new directory>
cd <the new directory>
Terminal
git init
git remote add origin git@github.com:riebeekn/elixir_code_hygiene.git
git fetch origin 5a7e1ffcbc715b9b8fbc4faf7e3bc7160fb9e185
git reset --hard FETCH_HEAD
You should now see the following git history.
Terminal
git log --pretty=oneline
Thanks for reading and I hope you enjoyed the post!