In part 1 of this series, we created a release and a docker image of our release. Part 2 saw us run through some manual one-time steps. We’re onto our final installment, and today we’ll finally get around to deploying our application!
As mentionned previously we’ll make use of Terraform for provisioning our infrasture, so you’ll need to have it installed in order to follow along. A few advantages of using Terraform:
- Our infrasture is defined in code so we can easily see what has been provisioned, something that is more difficult when defining things manually through the AWS console.
- Our infrasture can be easily replicated and expanded to multiple environments.
- Changes to our infrasture can be tracked in source control.
- Terraform supports multiple providers, so if we wanted to move to GCP for example, we would be dealing with the same scripting language.
We won’t be doing a comprehensive Terraform tutorial, prior knowledge of Terraform will be useful but is not necessary. The Terraform documentation is fairly extensive, so hopefully any points of confusion can be cleared up by referencing the docs.
So… let’s get going. The first thing we want to concentrate on is getting our basic scripts set up so we can easily handle different environments. To faciliate this we’ll start out by structuring our Terraform scripts around a makefile and environment specific directories. Each environment (i.e. QA, Staging etc.) will have it’s own directory.
Setting up the initial Terraform scripts
We’ll start by creating a new directory for our scripts.
Terminal
mkdir aws_warehouse_terraform
cd aws_warehouse_terraform
Next we’ll create some files and folders within this directory.
Terminal
touch Makefile
mkdir terraform
mkdir terraform/environments
mkdir terraform/environments/qa
We’ll assume we’re going to be deploying a QA environment for our application, thus we create the qa directory under environments. Essentially anything specific to a particular environment will be placed under the appropriate environment directory. Items that don’t vary per environment will be placed in the main terraform directory.
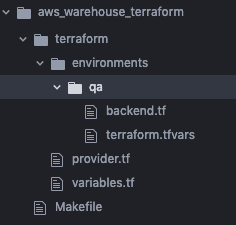
Let’s create a minimal starting point for our deployment.
Terminal
touch terraform/provider.tf
touch terraform/variables.tf
touch terraform/environments/qa/backend.tf
touch terraform/environments/qa/terraform.tfvars
Your directory should now look like:
We’ll start by implementing the Makefile.
/Makefile
.PHONY: help

help:
	@grep -E '^[a-zA-Z_-]+:.*?## .*$$' $(MAKEFILE_LIST) | sort | awk 'BEGIN {FS = ":.*?## "}; {printf "\033[36m%-30s\033[0m %s\n", $$1, $$2}'


# first we copy the environment specific backend and .tfvars, remove any existing local state, then run init
init: ## Initializes the terraform remote state backend and pulls the correct environments state.
	@if [ -z $(ENV) ]; then echo "ENV was not set" ; exit 10 ; fi
	@cd terraform \
	&& rm -f backend.tf \
	&& rm -f terraform.tfvars \
	&& cp environments/$(ENV)/* . \
	&& rm -rf .terraform/*.tf* \
	&& terraform init

plan: init ## Runs a plan.
	@cd terraform && terraform plan

apply: init ## Runs apply for a plan (requires confirmation).
	@cd terraform && terraform apply

destroy: init ## Runs destroy for a plan (requires confirmation).
	@cd terraform && terraform destroy
This Makefile is how we’ll interact with Terraform. Essentially all it does is act as a wrapper around the Terraform commands. Prior to executing the desired Terraform command, it copies over the appropriate environment specific files. Simple!
Next let’s move onto our common Terraform files.
/terraform/provider.tf
###### PROVIDER

provider "aws" {
  region  = var.aws_region
  version = "~> 2.1"
}
Terraform needs to know the provider we are using. In this case we are deploying to AWS so we specify aws as the provider. For the aws provider we also need to specify the region, instead of hard-coding this value, we’re specifying it with a variable, let’s define our variables next.
/terraform/variables.tf
###### Environment specific variables that need to be set in terraform.tfvars
variable "app_env" {
  description = "The name of the environment being spun up, i.e. QA, Prod, Dev etc."
}
variable "ecr_image_uri" {
  description = "The URI of the image to run for the environment"
}
variable "db_user_arn" {
  description = "The DB user arn, value is stored in AWS Secrets Manager"
}
variable "db_password_arn" {
  description = "The DB password arn, value is stored in AWS Secrets Manager"
}
variable "secret_key_base_arn" {
  description = "The Phoenix secret"
}

###### Defaults, can be over-ridden in terraform.tfvars if there is a need to
variable "app_name" {
  default     = "aws-warehouse"
  description = "The application name"
}
variable "aws_region" {
  default     = "us-east-1"
  description = "AWS region"
}
We define items in the variables.tf file that we don’t want to hard-code within the scripts. These are values that we feel might change between projects or environments; the idea being that we are trying to make our scripts as generic as possible. The convention we are following is that the variables.tf file is static and the values in it shouldn’t be changed. Any changes to the values of the variables are done via the environment specific variables file (terraform.tfvars). At the top of variables.tf we are defining some environment specific variables which by design don’t have defaults. These are values that will change between environments and as a result we want to require they be set in the environment specific files; this is accomplished by not providing a default for them in variables.tf.
With that in mind, let’s move onto our environment specific variables.
/terraform/environments/qa/terraform.tfvars
# Add environment specific variable values to this file, can also optionally
# over-ride defaults if desired
# REQUIRED, ENVIRONMENT SPECIFIC
app_env = "qa"
ecr_image_uri = "086691984892.dkr.ecr.us-east-1.amazonaws.com/aws-warehouse:0.1.0"
db_user_arn = "arn:aws:secretsmanager:us-east-1:086691984892:secret:aws_warehouse/qa/db_user-1KhY2A"
db_password_arn = "arn:aws:secretsmanager:us-east-1:086691984892:secret:aws_warehouse/qa/db_password-XzF1XZ"
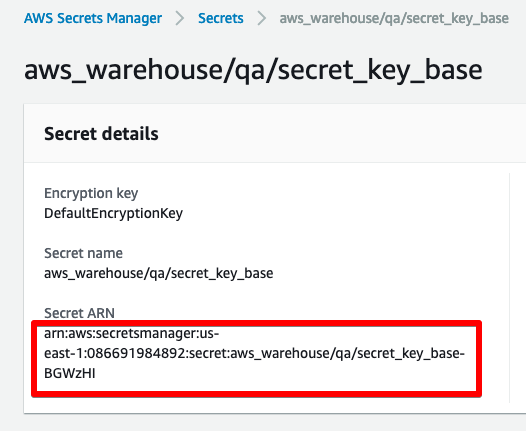
secret_key_base_arn = "arn:aws:secretsmanager:us-east-1:086691984892:secret:aws_warehouse/qa/secret_key_base-BGWzHI"
# OPTIONAL, default over-rides
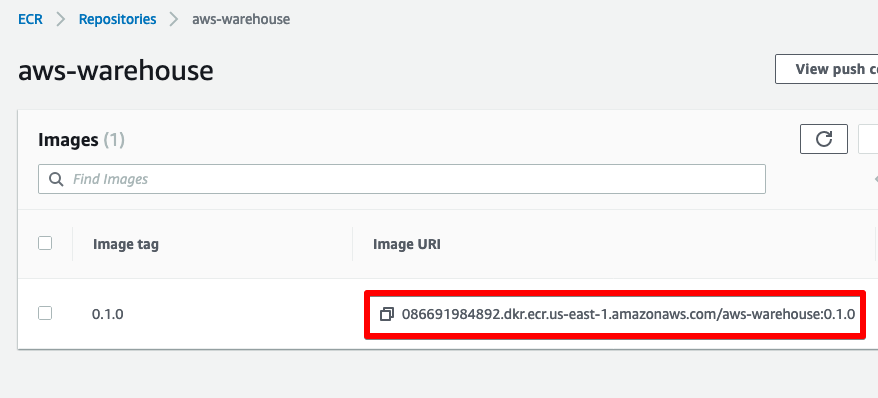
# nothing to over-ride as of yetWe’ve filled in our 5 required environment variables. The ecr_image_uri can be retrieved from the ECR repository we set up in part 2.
The other values are retrieved from the AWS Secrets, also set up in part 2.
You’ll need to swap things out with your own values.
Moving onto the backend.tf file, we won’t bother with a remote backend, but this is something that you would typically want to do. Without a remote backend the state of your infrasture is stored on your local computer. This is not ideal as it makes it difficult to share scripts / state with other people in your organization. Typically you would create a bucket on S3 to store your state, we’ll fill in an example of what the backend configuration might look like, but leave it commented out.
/terraform/environments/qa/backend.tf
# for now don't bother with a backend config
# but if using a backend config, create the bucket manually on AWS
#   - use all the defaults (bucket and objects not  public)
# terraform {
#   backend "s3" {
#     bucket = "my-terraform-state-bucket-for-my-app"
#     key = "aws-warehouse/qa"
#     region = "us-east-1"
#     encrypt = true
#   }
# }
We now have a minimal Terraform configuration, so let’s give it a go!
Terraform needs to authenticate against AWS in order to interact with it. One way of doing so is to export the Access Key and Secret values we downloaded as a .csv in part 2. We can provide them as environment variables on the command line and they will be picked up by Terraform.
Terminal
export AWS_ACCESS_KEY_ID=ABCD...
export AWS_SECRET_ACCESS_KEY=1234...
Now let’s throw a command at our Makefile. The apply command is used to apply our changes.
Terminal
make apply ENV=qa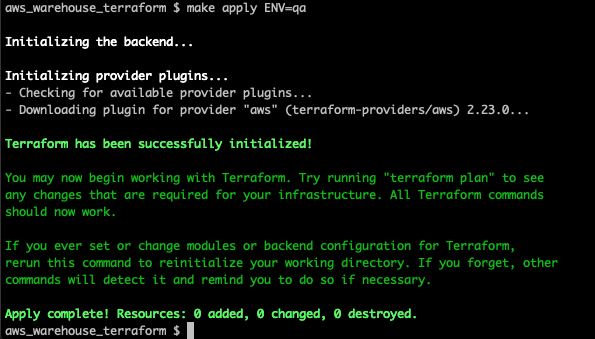
Success! Since we have not yet defined any infrasture, nothing is getting created, but we can see our scripts are working.
Defining our infrasture
We’re now ready to start defining our infrasture! We’ll build things up iteratively, and run Terraform periodically to make sure things are working as we go along.
An overview of the infrasture we’ll be provisioing
We’ll discuss in more detail as we tackle each item, but the core pieces of infrasture we’ll be creating:
- A VPC: provides a virtual network for our application.
- Security Groups: configures access to various parts of our infrasture.
- Application Load Balancer: the load balancer for our application.
- RDS: a cloud based PostgreSQL instance.
- ECS / EC2: ECS is a container orchestration service which will launch our docker image into EC2… which itself provides virtual server infrasture.
VPC
The first piece of infrasture we will create is a Virtual Private Cloud (VPC). We won’t go into the details of what a VPC is, but basically it provides a virtual network for our application. You can read more about VPC’s here.
For the most part I find the default Terraform AWS modules work well, but in the case of creating VPC’s, it’s a little tricky / tedious so I use the VPC community module. Let’s see what it looks like.
Terminal
touch terraform/vpc.tf/terraform/vpc.tf
###### VPC

locals {
  vpc_name = "${var.app_name}-${var.app_env}-vpc"
}

### Create the VPC
module "vpc" {
  source = "terraform-aws-modules/vpc/aws"

  name = local.vpc_name
  cidr = var.cidr

  azs             = var.availability_zones
  private_subnets = var.private_subnets
  public_subnets  = var.public_subnets

  enable_nat_gateway = false
  enable_vpn_gateway = false

  tags = {
    Terraform   = "true"
    Environment = var.app_env
    Name        = local.vpc_name
  }
}
Pretty straight forward, we specify the source to be the community module. We’re then creating a simple VPC that basically just sets up our availability zones and subnets. We tag / name things based on our application and environment variables so if we view things in the AWS console it will be obvious what application and environment it applies to.
We using some new variables in vpc.tf so let’s append the following to variables.tf.
/terraform/variables.tf
...
...

### VPC
variable "cidr" {
  default     = "10.0.0.0/16"
  description = "CIDR for the VPC"
}
variable "public_subnets" {
  default     = ["10.0.101.0/24", "10.0.102.0/24"]
  description = "Public subnets for the VPC"
}
variable "private_subnets" {
  default     = ["10.0.1.0/24", "10.0.2.0/24"]
  description = "Private subnets for the VPC"
}
variable "availability_zones" {
  default     = ["us-east-1a", "us-east-1b"]
  description = "Availability zones for subnets"
}
We should now be able to create the VPC.
Terminal
make apply ENV=qa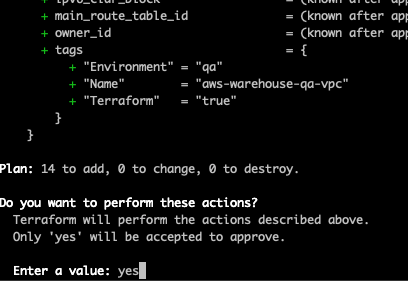
After typing yes at the prompt we get:
Security Groups
Next we will create some security groups for our application. This will allow us to configure access to the server we’ll be provisioning as well as allow our application to interact with the database instance we’ll be creating.
Terminal
touch terraform/security.tf/terraform/security.tf
###### SECURITY GROUPS

locals {
  alb_sg_name = "${var.app_name}-${var.app_env}-alb-sg"
  app_sg_name = "${var.app_name}-${var.app_env}-application-sg"
  ssh_sg_name = "${var.app_name}-${var.app_env}-ssh-sg"
  rds_sg_name = "${var.app_name}-${var.app_env}-rds-sg"
}

### Create a security group for the load balancer
resource "aws_security_group" "alb_sg" {
  name = local.alb_sg_name
  description = "HTTP access from anywhere"
  vpc_id = module.vpc.vpc_id

  ingress {
    from_port   = 80
    to_port     = 80
    protocol    = "tcp"
    cidr_blocks = ["0.0.0.0/0"]
    ipv6_cidr_blocks = ["::/0"]
  }
  egress {
    from_port   = 0
    to_port     = 0
    protocol    = "-1"
    cidr_blocks = ["0.0.0.0/0"]
    ipv6_cidr_blocks = ["::/0"]
  }
  tags = {
    Name = local.alb_sg_name
  }
}

### Create a security group for the ec2 instances
resource "aws_security_group" "appserver_sg" {
  name        = local.app_sg_name
  description = "Allow access from load balancer sg"
  vpc_id      = module.vpc.vpc_id

  ingress {
    from_port        = 80
    to_port          = 80
    protocol         = "tcp"
    security_groups  = [aws_security_group.alb_sg.id]
  }
  egress {
    from_port   = 0
    to_port     = 0
    protocol    = "-1"
    cidr_blocks = ["0.0.0.0/0"]
  }
  tags = {
    Name = local.app_sg_name
  }
}

### Create a security group to enable ssh access
resource "aws_security_group" "ssh_sg" {
  name        = local.ssh_sg_name
  description = "SSH access from anywhere"
  vpc_id      = module.vpc.vpc_id

  ingress {
    from_port        = 22
    to_port          = 22
    protocol         = "tcp"
    cidr_blocks      = ["0.0.0.0/0"]
    ipv6_cidr_blocks = ["::/0"]
  }
  egress {
    from_port   = 0
    to_port     = 0
    protocol    = "-1"
    cidr_blocks = ["0.0.0.0/0"]
  }
  tags = {
    Name = local.ssh_sg_name
  }
}

### Create a security group for the RDS instance
resource "aws_security_group" "rds_sg" {
  name        = local.rds_sg_name
  description = "RDS security group"
  vpc_id      = module.vpc.vpc_id

  ingress {
    from_port       = 5432
    to_port         = 5432
    security_groups = [aws_security_group.appserver_sg.id]
    protocol        = "tcp"
  }
  egress {
    from_port        = 0
    to_port          = 0
    protocol         = "-1"
    cidr_blocks      = ["0.0.0.0/0"]
    ipv6_cidr_blocks = ["::/0"]
  }
  tags = {
    Name = local.rds_sg_name
  }
}
We’re creating four security groups: one to allow access to our load balancer from the internet; one to allow the load balancer to access our application; one to allow us to SSH into our EC2 instances; and finally one which allows our application to access the RDS instance.
Depending on your use case, you might want to adjust these settings. For instance maybe you want to restrict which IPs have SSH access. Or perhaps when intially building out your infrasture you want the EC2 servers directly accessible via the internet, in order to test things without going thru the load balancer. Adjusting the ingress settings would accomplish this. See the Terraform aws_security_group documentation for more details.
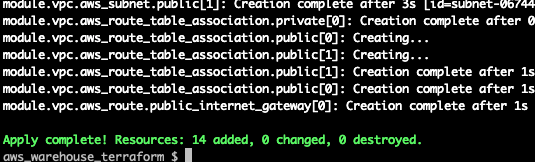
In any case, let’s apply the above settings.
Terminal
make apply ENV=qa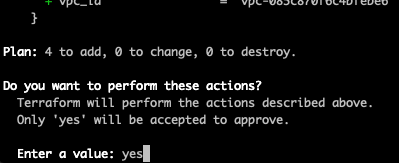

Fantastic! Next let’s move onto the load balancer.
ALB
As the name suggests, the Application Load Balancer will provide load balancing for our application. Setting up the load balancer is straight forward via the Terraform aws_lb module.
Terminal
touch terraform/alb.tf/terraform/alb.tf
###### ALB

locals {
  lb_name = "${var.app_name}-${var.app_env}-lb"
  tg_name = "${var.app_name}-${var.app_env}-target-group"
}

### Application load balancer
resource "aws_lb" "lb" {
  name               = local.lb_name
  internal           = false
  load_balancer_type = "application"
  security_groups    = [aws_security_group.alb_sg.id]
  subnets            = module.vpc.public_subnets

  tags = {
    Environment = var.app_env
  }
}

### Target group for the load balancer
resource "aws_lb_target_group" "lb_target_group" {
  name     = local.tg_name
  port     = 80
  protocol = "HTTP"
  vpc_id   = module.vpc.vpc_id
}

# Associate the load balancer with the target group via a listner
resource "aws_lb_listener" "lb_listener" {
  load_balancer_arn = aws_lb.lb.arn
  port              = "80"
  protocol          = "HTTP"

  default_action {
    type             = "forward"
    target_group_arn = aws_lb_target_group.lb_target_group.arn
  }
}
We don’t even need any new variables, let’s provision the load balancer (note: this will take a few minutes to provision).
Terminal
make apply ENV=qa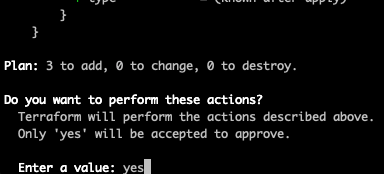
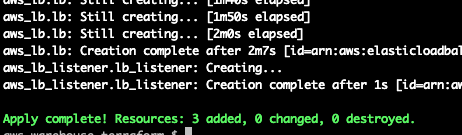
Next we want to set up our database instance. Prior to doing so we need to add a Terraform script for retrieving the values we stored in AWS Secrets Manager however. We will set the database user and password based on the AWS Secrets values.
Secrets
To retrieve the values we set up in part 2 is pretty simple, we just need to use the Terraform aws_secretsmanager_secret_version module to provide a reference to the 3 values we want to pull out of Secrets Manager.
We’ll create a secrets.tf file for this.
Terminal
touch terraform/secrets.tf/terraform/secrets.tf
###### ARNs for secrets stored in AWS Secrets Manager

data "aws_secretsmanager_secret_version" "secret_key_base" {
  secret_id = var.secret_key_base_arn
}
data "aws_secretsmanager_secret_version" "db_user" {
  secret_id = var.db_user_arn
}
data "aws_secretsmanager_secret_version" "db_password" {
  secret_id = var.db_password_arn
}
With the above we’re referencing the variables we set up in terraform.tfvars.
With this in place, we can now move on to provisioning the database.
RDS
Let’s create a new Terraform file for defining our RDS infrasture via the aws_db_instance resource.
Terminal
touch terraform/rds.tf/terraform/rds.tf
###### RDS

locals {
  identifier = "${var.app_name}-${var.app_env}-db"
  # dashes are not valid database names so replace dashes with underscores
  instance_name     = "${replace(var.app_name, "-", "_")}_${var.app_env}"
  subnet_group_name = "${var.app_name}-${var.app_env}-db-subnet"
}

resource "aws_db_subnet_group" "db_sn" {
  name       = local.subnet_group_name
  subnet_ids = module.vpc.private_subnets
}

resource "aws_db_instance" "db" {
  identifier              = local.identifier
  name                    = local.instance_name
  username                = jsondecode(data.aws_secretsmanager_secret_version.db_user.secret_string)["DB_USER"]
  password                = jsondecode(data.aws_secretsmanager_secret_version.db_password.secret_string)["DB_PASSWORD"]
  allocated_storage       = 20
  storage_type            = "gp2"
  engine                  = "postgres"
  engine_version          = "10.6"
  port                    = 5432
  instance_class          = var.rds_instance_type
  backup_retention_period = 7
  publicly_accessible     = false
  storage_encrypted       = var.rds_encrypt_at_rest
  multi_az                = false
  db_subnet_group_name    = aws_db_subnet_group.db_sn.name
  vpc_security_group_ids  = [aws_security_group.rds_sg.id]
  skip_final_snapshot     = true
  tags = {
    Name = local.identifier
  }
}
Nothing too complicated here. A few points to make note of:
- We’re using
jsondecodein combination with the items we set up insecrets.tfto grab our database user and password values. - We don’t want the database to be publically accessible so have set
publicly_accessibleto false. We use ourrds_sgsecurity group to provide our application access to the database.
We need to add a few more variables prior to applying the script.
/terraform/variables.tf
...
...

### RDS
variable "rds_instance_type" {
  default     = "db.t2.micro"
  description = "RDS instance type to use"
}
variable "rds_encrypt_at_rest" {
  default     = false
  description = "DB encryptiong settings, note t2.micro does not support encryption at rest"
}
Note: it could be argued the above values would be better off not having defaults; forcing them to be defined in the environment specific terraform.tfvars file. For instance, maybe db.t2.micro instances are used on QA and other testing environments, where-as a db.t2.medium instance is used on production. Deciding what should and shouldn’t have a default is a judgement call, and depends on the particular situation.
Let’s provision our database (again this will take some time).
Terminal
make apply ENV=qa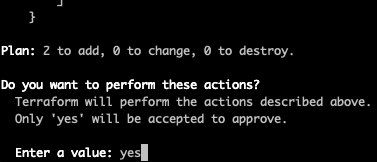

Fantastic, we have a database! We are getting close to having a deployed application!
IAM
Prior to provisioning the EC2 instance and the ECS containerization service, we need to set up some AWS IAM permissions. These permissions will provide ECS the ability to launch and manage EC2 instances.
We’ll create an iam.tf file for the permissions.
Terminal
touch terraform/iam.tf/terraform/iam.tf
###### IAM

locals {
  instance_role_name    = "${var.app_name}-${var.app_env}-ecs-instance-role"
  instance_profile_name = "${var.app_name}-${var.app_env}-ecs-instance-profile"
  service_role_name     = "${var.app_name}-${var.app_env}-ecs-service-role"
}

### ECS EC2 instance role
resource "aws_iam_role" "ecs_instance_role" {
  name               = local.instance_role_name
  path               = "/"
  assume_role_policy = <<EOF
{
  "Version": "2012-10-17",
  "Statement": [
    {
      "Action": "sts:AssumeRole",
      "Principal": {
        "Service": "ec2.amazonaws.com"
      },
      "Effect": "Allow",
      "Sid": ""
    }
  ]
}
EOF
}

resource "aws_iam_role_policy_attachment" "ecs_instance_role_attachment" {
  role = aws_iam_role.ecs_instance_role.name
  policy_arn = "arn:aws:iam::aws:policy/service-role/AmazonEC2ContainerServiceforEC2Role"
}

resource "aws_iam_instance_profile" "ecs_instance_profile" {
  name = local.instance_profile_name
  path = "/"
  role = aws_iam_role.ecs_instance_role.id
}


### ECS service role
resource "aws_iam_role" "ecs_service_role" {
  name = local.service_role_name

  assume_role_policy = <<EOF
{
  "Version": "2012-10-17",
  "Statement": [
    {
      "Action": "sts:AssumeRole",
      "Principal": {
        "Service": "ecs.amazonaws.com"
      },
      "Effect": "Allow",
      "Sid": ""
    }
  ]
}
EOF
}

resource "aws_iam_role_policy_attachment" "ecs_service_attach" {
  role       = "${aws_iam_role.ecs_service_role.name}"
  policy_arn = "arn:aws:iam::aws:policy/service-role/AmazonEC2ContainerServiceRole"
}
In the above, we’ve set up the required policies and roles, let’s apply them.
Terminal
make apply ENV=qa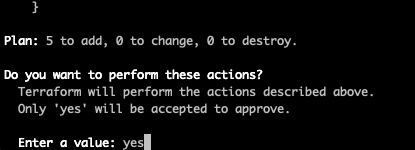
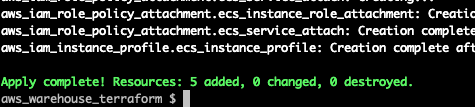
With these permissions in place, we are now ready for the final step, creating the ECS cluster and associated components.
ECS
ECS is what will handle deploying our docker image to EC2. In order to do this, we need to create an ECS Cluster, and then create an ECS service, which will be in charge of deploying the image to EC2. We also need to create a task definition, which describes our docker image, and also an auto-scaling group. Let’s create the full ecs.tf file and then we’ll then walk through the various components.
Terminal
touch terraform/ecs.tf/terraform/ecs.tf
###### ECS

locals {
  cluster_name         = "${var.app_name}-${var.app_env}"
  service_name         = "${var.app_name}-${var.app_env}-service"
  asg_name             = "${var.app_name}-${var.app_env}-asg"
  launch_config_prefix = "${var.app_name}-${var.app_env}"
}

### Cluster
resource "aws_ecs_cluster" "cluster" {
  name = local.cluster_name
}

#### Launch config
resource "aws_launch_configuration" "ecs_launch_configuration" {
  name_prefix          = local.launch_config_prefix
  image_id             = var.ecs_ami
  instance_type        = var.ecs_instance_type
  iam_instance_profile = aws_iam_instance_profile.ecs_instance_profile.id

  lifecycle {
    create_before_destroy = true
  }

  security_groups             = [aws_security_group.appserver_sg.id, aws_security_group.ssh_sg.id]
  associate_public_ip_address = "true"
  key_name                    = var.key_pair_name

  user_data = <<EOF
#!/bin/bash

echo ECS_CLUSTER=${local.cluster_name} >> /etc/ecs/ecs.config
EOF
}

### Auto-scaling
resource "aws_autoscaling_group" "ecs_autoscaling_group" {
  name = local.asg_name
  max_size = var.max_instance_size
  min_size = var.min_instance_size
  desired_capacity = var.desired_capacity
  vpc_zone_identifier = module.vpc.public_subnets
  launch_configuration = aws_launch_configuration.ecs_launch_configuration.name
  health_check_type = "ELB"

  # populate the 'Name' field of the EC2 instance
  tag {
    key = "Name"
    value = local.cluster_name
    propagate_at_launch = true
  }
}

### Task definition
data "aws_ecs_task_definition" "task" {
  task_definition = aws_ecs_task_definition.task.family

  depends_on = [aws_ecs_task_definition.task]
}

resource "aws_ecs_task_definition" "task" {
  family = local.cluster_name

  container_definitions = <<CONTAINER
  [
    {
      "cpu": 1024,
      "memory": 983,
      "essential" :true,
      "image": "${var.ecr_image_uri}",
      "name": "${var.app_name}-${var.app_env}",
      "portMappings": [
        {
          "containerPort": 4000,
          "hostPort": 80,
          "protocol": "tcp"
        }
      ],
      "environment": [
        {
          "name": "SECRET_KEY_BASE",
          "value": "${jsondecode(data.aws_secretsmanager_secret_version.secret_key_base.secret_string)["SECRET_KEY_BASE"]}"
        },
        {
          "name": "DB_HOST",
          "value": "${aws_db_instance.db.address}"
        },
        {
          "name": "DB_INSTANCE",
          "value": "${aws_db_instance.db.name}"
        },
        {
          "name": "DB_USER",
          "value": "${jsondecode(data.aws_secretsmanager_secret_version.db_user.secret_string)["DB_USER"]}"
        },
        {
          "name": "DB_PASSWORD",
          "value": "${jsondecode(data.aws_secretsmanager_secret_version.db_password.secret_string)["DB_PASSWORD"]}"
        }
      ]
    }
  ]
CONTAINER
}

### Service
resource "aws_ecs_service" "service" {
  name            = local.service_name
  cluster         = aws_ecs_cluster.cluster.id
  task_definition = "${aws_ecs_task_definition.task.family}:${max("${aws_ecs_task_definition.task.revision}", "${data.aws_ecs_task_definition.task.revision}")}"
  desired_count   = 1
  load_balancer {
    target_group_arn = "${aws_lb_target_group.lb_target_group.arn}"
    container_name   = "${var.app_name}-${var.app_env}"
    container_port   = 4000
  }
  depends_on = [aws_lb.lb]
}
We also need some more variables.
Note: The ecs_ami value below is specific to a region. So if you are deploying your infrasture to a region other than us-east-1, you’ll need to specify the appropriate ami (a listing of ami's can be found here: http://docs.aws.amazon.com/AmazonECS/latest/developerguide/ecs-optimized_AMI.html).
/terraform/variables.tf
...
...
### Autoscaling (ECS)
variable "max_instance_size" {
  default     = 2
  description = "Maximum number of instances in the cluster"
}
variable "min_instance_size" {
  default     = 0
  description = "Minimum number of instances in the cluster"
}
variable "desired_capacity" {
  default     = 1
  description = "Desired number of instances in the cluster"
}
### ECS
variable "ecs_ami" {
  default = "ami-0fac5486e4cff37f4" # us-east-1, ami 2
  # Full List: http://docs.aws.amazon.com/AmazonECS/latest/developerguide/ecs-optimized_AMI.html
}
variable "ecs_instance_type" {
  default     = "t2.micro"
  description = "Instance type to use"
}
variable "key_pair_name" {
  default     = "aws_warehouse_key_pair"
  description = "Key pair to use for ssh access, NOTE: it is assumed this key pair exists, it will not be created!"
}
So this is kind of a lot, right! Let’s have a more detailed look. First off we are creating a cluster:
Nothing complicated here, we just specify the name for the cluster. Next comes a launch configuration and auto-scaling group:
The launch configuration is an instance configuration template which in turn is used by the auto scaling group to launch EC2 instances into our Cluster. Note we are applying our key pair from part 2 to the EC2 instance so that we’ll be able to SSH into the instance.
Finally we have the task defintion and ECS service.
The task definition is used to specify which docker image to run, along with some other items such as the CPU and memory that should be assigned to the image. This is also where we pass in the environment specific variables for the image. Some of these we are pulling from AWS Secrets Manager, others such as the database host we pull from the output of other Terraform scripts, an example of this is the database host value.
Note: In the data "aws_ecs_task_definition" "task" section we have a depends_on attribute. For the most part Terraform is smart enough to know in what order to apply components. Occasionally thou we need to provide a hint via depends_on. In this case, without depends_on the script will fail the first time we attempt to run it, as the task defintion will not have been created when Terraform runs: data "aws_ecs_task_definition" "task". Adding the depends_on ensures the task is created first.
Finally, the ECS service pulls things together, specifying which task to use, what cluster to use and what load balancer to use.
Let’s give it a go!
Terminal
make apply ENV=qa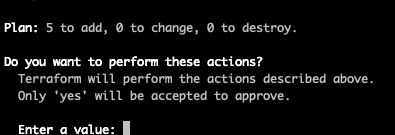

Our application is now deployed to AWS!
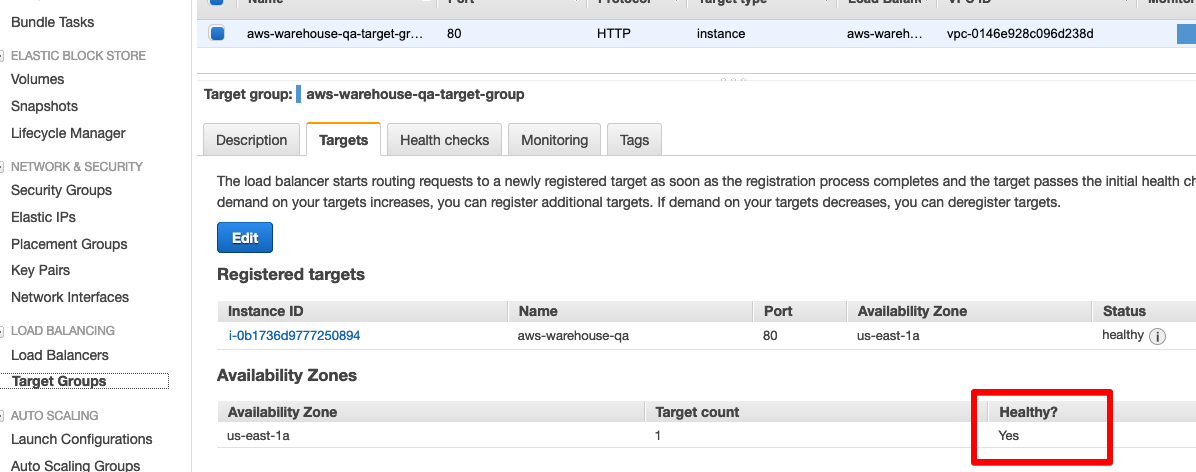
We now having a running instance of our application. Navigate to the EC2 dashboard in the AWS Console and select Target Groups. You should see a registered target showing up as healthy (the target might take a minute or two to show up after applying the scripts, and the target will briefly show as unhealthy).
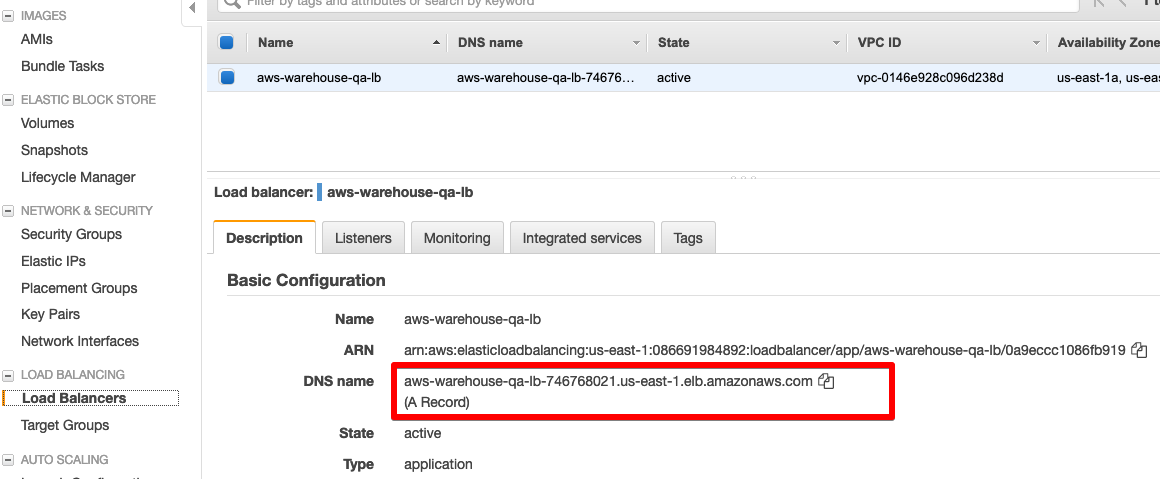
Once a healthy target shows up, you can grab the URL for our application by selecting Load Balancers in the EC2 dashboard and grabbing the URL for the load balancer.
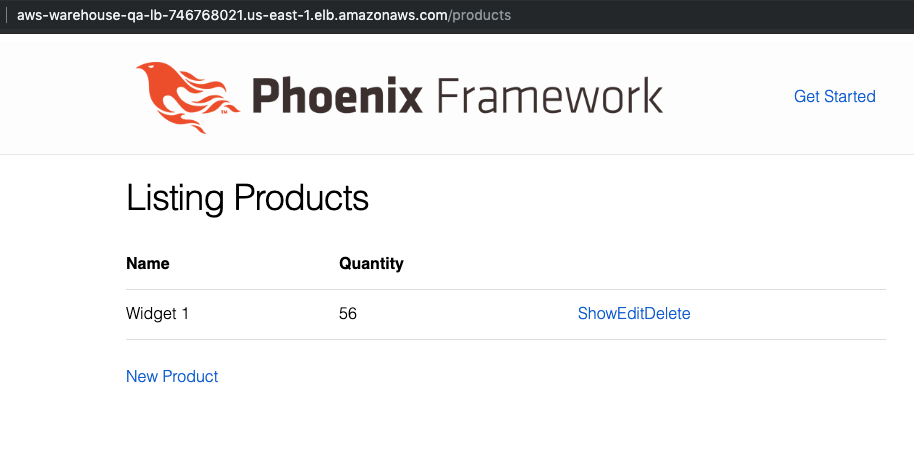
Throw the URL in your browser, and you should see our application running on AWS!
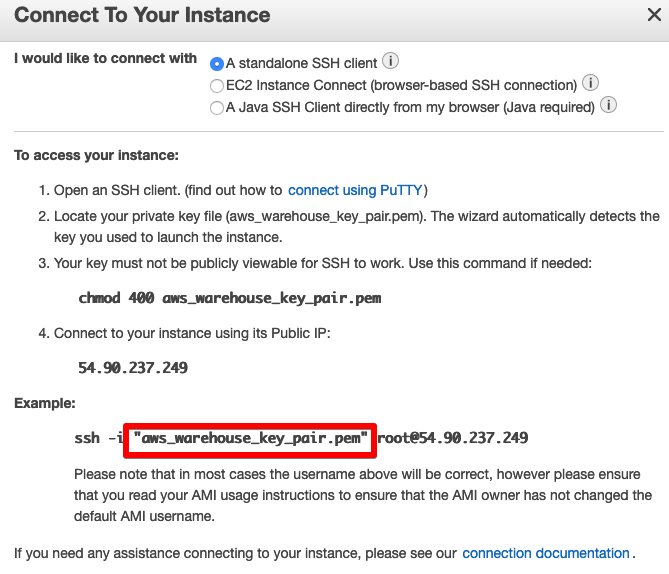
If wanting to SSH into the running EC2 instance, this can be done by selecting Instances in the EC2 dashboard and selecting Connect.
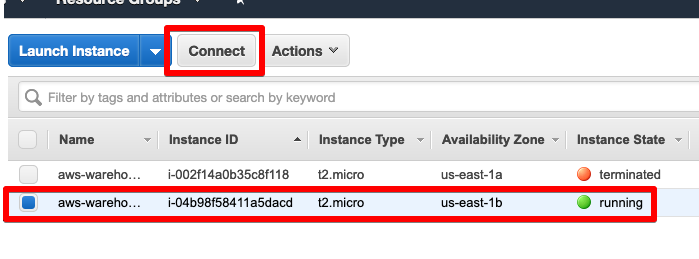
You’ll see the key pair we created in part 2 has been applied to the EC2 instance.
Tearing it down
You’ll want to tear down the environment to avoid unnecessary AWS charges, this is simple to do, just run the destroy command.
Terminal
make destroy ENV=qa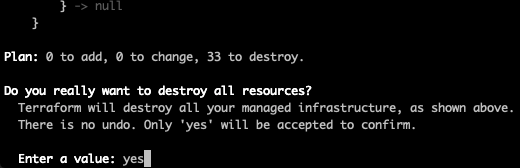
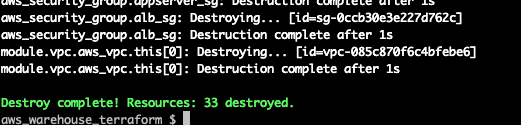
Done and dusted!
You will also want to delete the secrets you created in AWS Secrets manager as there is a small montly fee associated with each secret you store.
Summary
Hopefully this serves as a decent jumping off point for deploying a Phoenix application to AWS. For a real deployment you would of course want to create a domain, DNS entries, use SSL etc. but hopefully the basics have been covered.
A final note on Terraform… I find working iteratively is an effective way of building things out. However, once everything is running, it is always a good idea to tear everything down and then re-create it. This ensures that you haven’t missing any dependencies / synchronization issues that will trip up the scripts when they are run in one go. Any dependency issues can usually be resolved with an explicit dependency via the depends_on directive… as we did with the aws_ecs_task_definition.
Thanks for reading and I hope you enjoyed the post!