In part 1 we walked thru the installation and customization of Phx.Gen.Auth. In today’s post we’ll continue with some customizations; we’ll add the ability to block user accounts, and we’ll implement simple Bamboo email notifications.
Getting started
If you’ve been following along you can continue with the code from part 1, or you can grab the code from GitHub.
Clone the Repo:
If cloning from GitHub:
Terminal
git clone -b part-1 https://github.com/riebeekn/phx-gen-auth-example auth
cd auth
Let’s create a branch for today’s work:
Terminal
git checkout -b part-2And make sure we have our dependencies and database set-up.
Terminal
mix deps.getTerminal
cd assets && npm installNote: before running ecto.setup you may need to update the username / password database settings in dev.config to match your local postgres settings, i.e.
/config/dev.config …line 69
# Configure your database
config :auth, Auth.Repo,
  username: "postgres",
  password: "postgres",
  database: "auth_dev",
  hostname: "localhost",
  pool_size: 10
Terminal
cd ..
mix ecto.setup
With that out of the way let’s get to blocking some users!
Adding the ability to block a user
The first step in our implementation is to add a new column to the users table… so we’ll need a migration.
Adding the migration
Terminal
mix ecto.gen.migration add_is_blocked_to_users
/priv/repo/migrations/timestamp_add_is_blocked_to_users.exs
defmodule Auth.Repo.Migrations.AddIsBlockedToUsers do
  use Ecto.Migration

  def change do
    alter table(:users) do
      add_if_not_exists(:is_blocked, :boolean, default: false)
    end
  end
end
Pretty simple, we add a new column with a default of false. We’ll use this column to indicate whether a user is blocked or not. The default value of false ensures any existing users will not become blocked when the migration is run. Likewise the default ensures new users won’t be blocked on registration.
Let’s run the migration.
Terminal
mix ecto.migrate
Next we need a quick update to the user schema.
Updating the user schema
We’ll add a field for the new database column, and in anticipation of the change required to the accounts context, also a new is_blocked? function. Similar to the is_confirmed? function from part 1, this could just be implemented as an attribute check in accounts… it’s pretty much a stylistic choice as to which you prefer.
/lib/auth/accounts/user.ex
...
...
field :hashed_password, :string
field :confirmed_at, :naive_datetime
field :is_blocked, :boolean, default: false

...
...

@doc """
Returns true if the user has been blocked, false otherwise
"""
def is_blocked?(user), do: user.is_blocked
Onto the context!
Updating the accounts context
This is another simple change, we’ll add a new condition in get_user_by_email_and_password to check if the user has been blocked.
/lib/auth/accounts.ex
def get_user_by_email_and_password(email, password)
    when is_binary(email) and is_binary(password) do
  user = Repo.get_by(User, email: email)

  cond do
    !User.valid_password?(user, password) -> {:error, :bad_username_or_password}
    !User.is_confirmed?(user) -> {:error, :not_confirmed}
    User.is_blocked?(user) -> {:error, :user_blocked}
    true -> {:ok, user}
  end
end
Finally we need a controller update.
Updating the user_session controller
We need to add a new match for the {:error, :user_blocked} tuple which we added to the context.
/lib/auth_web/controllers/user_session_controller.ex
def create(conn, %{"user" => user_params}) do
  %{"email" => email, "password" => password} = user_params

  with {:ok, user} <- Accounts.get_user_by_email_and_password(email, password) do
    UserAuth.log_in_user(conn, user, user_params)
  else
    {:error, :bad_username_or_password} ->
      render(conn, "new.html", error_message: "Invalid e-mail or password.")

    {:error, :user_blocked} ->
      render(conn, "new.html",
        error_message: "Your account has been locked, please contact an administrator."
      )

    {:error, :not_confirmed} ->
    ...
    ...
And with that… we’re done… well not really, but we have a simple first pass. Let’s do a quick run thru of our new feature.
Seeing the changes in action
Fire up the server:
Terminal
mix phx.serverNow we’ll manually update the is_blocked field of an existing user in TablePlus and attempt to log in.

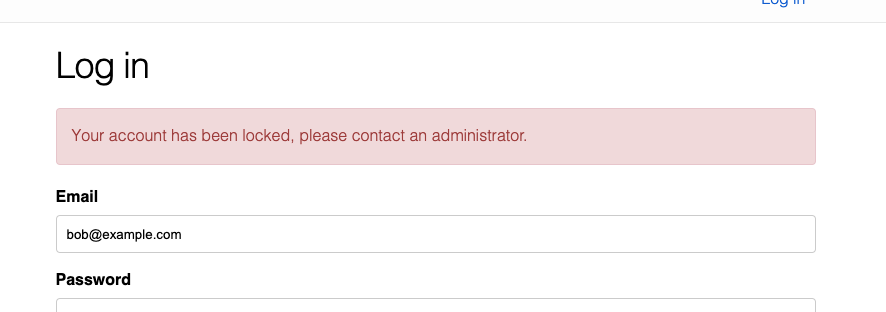
Fantastic, everything works… maybe we really are done!
Alas, not so. If we set is_blocked back to false for bob@example.com; login; and then set bob once again to blocked, you’ll notice bob can still access the application. This is down to the session token still existing.
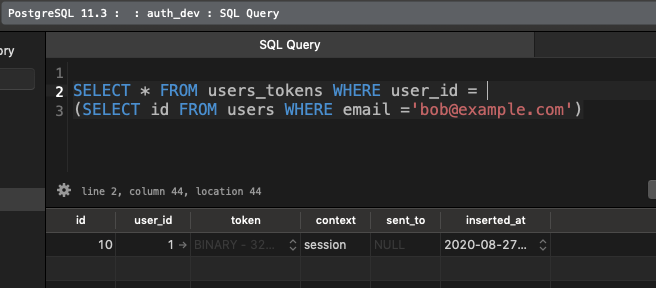
When a user logs in, a session token is created for them, we need to deal with this as part of the block functionality. If we don’t take the session token into account, a user who is already logged in won’t actually get blocked until they log out and then attempt to log back in.
So we need to remove the user_token row from the database when we block a user. Given there are a couple of steps involved in blocking a user, we’ll create block and unblock functions. To keep things simple we won’t bother creating a UI for the blocking functionality as this would probably go in some sort of admin interface which we don’t have. Let’s see what the backend methods look like however.
Implementing the block and unblock functions
We need a couple of new functions in accounts.ex:
/lib/auth/accounts.ex
@doc """
Block a user and delete any tokens assigned to them
"""
def block_user(user) do
  {:ok, %{tokens: _tokens, user: user}} =
    user
    |> block_user_multi()
    |> Repo.transaction()

  {:ok, user}
end

defp block_user_multi(user) do
  changeset = user |> User.block_user_changeset(true)

  Ecto.Multi.new()
  |> Ecto.Multi.update(:user, changeset)
  |> Ecto.Multi.delete_all(:tokens, UserToken.user_and_contexts_query(user, :all))
end

@doc """
Unblock a user
"""
def unblock_user(user) do
  user
  |> User.block_user_changeset(false)
  |> Repo.update()
end
Nothing too tricky, the unblock_user function is very simple, we just call into Repo.update with a block_user_changeset which we’ll create momentarily. block_user is slightly more complicated as we need to remove those pesky tokens. We make use of an Ecto.Multi to update the user and then delete the tokens.
We now need to add the block_user_changeset function we’re using in the block / unblock functions.
/lib/auth/accounts/user.ex
@doc """
A user changeset for blocking / unblocking a user.
"""
def block_user_changeset(user, should_block?) do
  user
  |> cast(%{is_blocked: should_block?}, [:is_blocked])
end
This function just flips the is_blocked flag based on the input parameter.
With these changes we should be all good.
We’ll run the server in interactive mode and see what happens when we fire off our functions.
Terminal
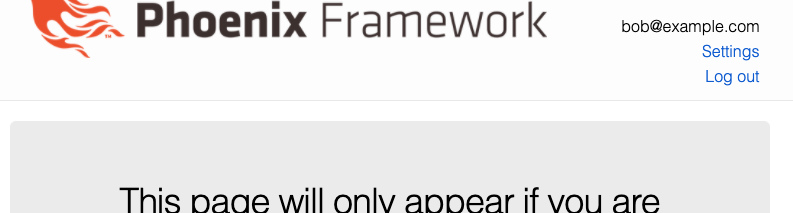
iex -S mix phx.serverWe’ll log in with Bob and navigate to our secured page.
Now let’s block Bob by typing the following into the iex session.
Terminal
Auth.Accounts.get_user_by_email("bob@example.com") |> Auth.Accounts.block_user()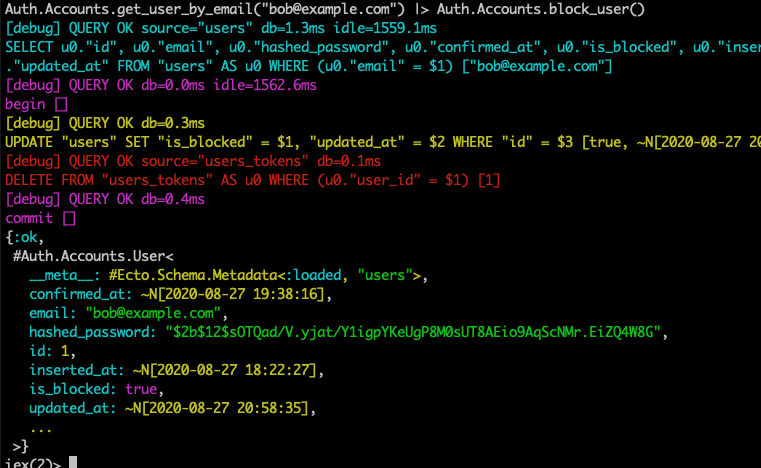
Attempting to access a secured area of the application now results in Bob being booted to the log in page, as he has been logged out, perfect!
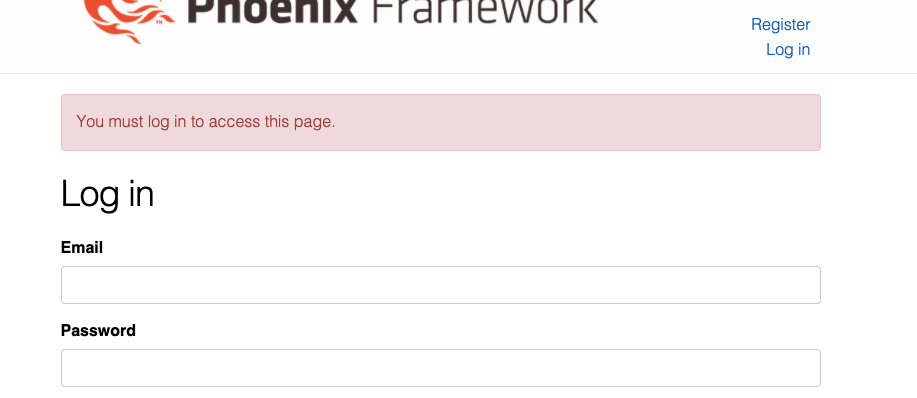
… and we get the expected result when attempting to log back in.
Let’s try an unblock.
Terminal
Auth.Accounts.get_user_by_email("bob@example.com") |> Auth.Accounts.unblock_user()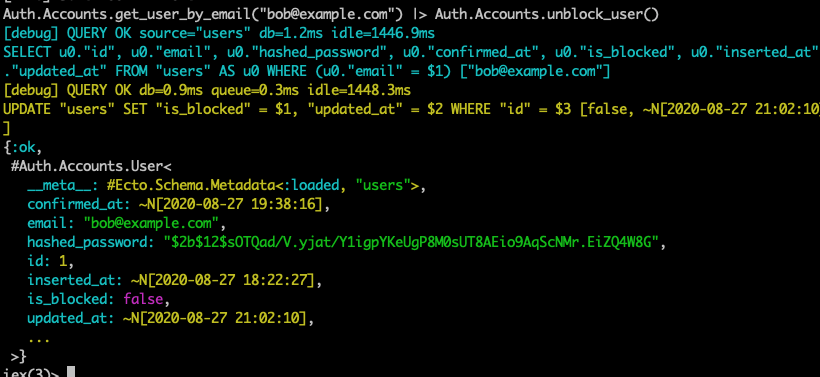
As expected Bob can now log in.
The functionality is looking good, but we have some testing to do, let’s get at it!
Updating the tests
Context tests
We’ll tackle a few things when it comes to the accounts test:
- The new logic around
get_user_by_email_and_password. - The
block_userfunction. - The
unblock_userfunction.
We’ll start by adding a test in the get_user_by_email_and_password describe block to ensure we don’t return a user when they are blocked.
/test/auth/accounts_test.exs
describe "get_user_by_email_and_password/1" do
  ...
  ...
  test "does not return the user if they have been blocked" do
    user = user_fixture()

    Accounts.block_user(user)

    assert {:error, :user_blocked} ==
             Accounts.get_user_by_email_and_password(user.email, valid_user_password())
  end
end
Simple enough, we just block the user created by our fixture and then check for an appropriate return tuple from get_user_by_email_and_password.
Now let’s add a test for the block_user functionality:
/test/auth/accounts_test.exs
describe "block_user/1" do
  setup do
    user = user_fixture()
    token = Accounts.generate_user_session_token(user)

    %{
      user: user,
      token: token
    }
  end

  test "sets the is_blocked flag to true and removes any tokens belonging to the user", %{user: user, token: token} do
    assert {:ok, user} = Accounts.block_user(user)

    assert user.is_blocked == true
    refute Accounts.get_user_by_session_token(token)
  end
end
In the setup block we create both a user and a token. The test itself verifies is_blocked is set to false, and that the token is removed.
The unblock_user test is very simple:
/test/auth/accounts_test.exs
describe "unblock_user/1" do
  setup do
    {:ok, user} =
      user_fixture()
      |> Accounts.block_user()

    %{user: user}
  end

  test "sets the is_blocked flag to false", %{user: user} do
    assert {:ok, user} = Accounts.unblock_user(user)
    assert user.is_blocked == false
  end
end
In the setup, we create a user, block them and then in the test itself, unblock them and check the is_blocked flag is false.
Controller tests
Since we haven’t added any UI components for block_user or unblock_user, we have nothing to do in terms of controller tests when it comes to these functions. We do want to add a user_session_controller test for what occurs when a blocked user attempts to log in however. We’ll add this after the existing "emits error message when account is not confirmed" test.
/test/auth_web/controllers/user_session_controller_test.exs …line 68
test "emits error message when account is not confirmed", %{conn: conn} do
  ...
  ...
end

test "emits error message when account is blocked", %{conn: conn} do
  {:ok, user} =
    user_fixture()
    |> Auth.Accounts.block_user()

  conn =
    post(conn, Routes.user_session_path(conn, :create), %{
      "user" => %{
        "email" => user.email,
        "password" => valid_user_password(),
        "remember_me" => "true"
      }
    })

  response = html_response(conn, 200)
  assert response =~ "<h1>Log in</h1>"

  assert response =~
           "Your account has been locked, please contact an administrator."
end
Simple, we block the user and ensure we get the expected response when attempting to log in.
Running the tests, everything is passing.
Terminal
mix test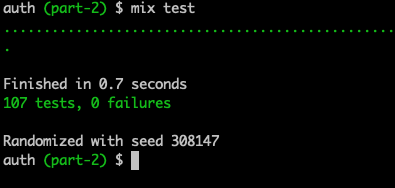
That does it for block / unblock, before ending our tour of Phx.Gen.Auth let’s swap out the console notifier with a simple Bamboo implementation.
Swapping out the console notifier
We’re not going to do anything complicated here, in a real implementation you’d probably want to put together some nice looking emails, maybe making use of MJML, but we’ll keep it basic.
Our email package of choice will be Bamboo. It’s a great way to send email and comes with many adapters for various email services. It also includes a local adapter, which will work great for our purposes… so let’s get to it!
Adding Bamboo
We need to add Bamboo to our mix.exs file and grab the dependency.
/mix.exs
defp deps do
  [
    {:bcrypt_elixir, "~> 2.0"},
    {:phoenix, "~> 1.5.4"},
    {:phoenix_ecto, "~> 4.1"},
    {:ecto_sql, "~> 3.4"},
    {:postgrex, ">= 0.0.0"},
    {:phoenix_html, "~> 2.11"},
    {:phoenix_live_reload, "~> 1.2", only: :dev},
    {:phoenix_live_dashboard, "~> 0.2"},
    {:telemetry_metrics, "~> 0.4"},
    {:telemetry_poller, "~> 0.4"},
    {:gettext, "~> 0.11"},
    {:jason, "~> 1.0"},
    {:plug_cowboy, "~> 2.0"},
    {:phx_gen_auth, "~> 0.4.0", only: [:dev], runtime: false},
    {:bamboo, "~> 1.5"}
  ]
end
Terminal
mix deps.get
In terms of configuration, we’ll stick with just the dev config. For a production application you’d need to configure your prod config to include the settings for the adapter you’re looking to use.
/config/dev.exs
# Bamboo configuration
config :auth, Auth.Mailer, adapter: Bamboo.LocalAdapter
And when I said we’ll just add a dev config, it turns out I lied, we’ll also need a configuration entry in test.exs so the tests continue to run. Bamboo comes with a handy TestAdapter just for this purpose.
/config/test.exs
# Bamboo test configuration
config :auth, Auth.Mailer, adapter: Bamboo.TestAdapter
Finally in order to display our emails when running locally we need to update router.ex. I’ve placed the Bamboo specific route code under the LiveDashboard section.
/lib/auth_web/router.ex …line 37
...

if Mix.env() in [:dev, :test] do
  import Phoenix.LiveDashboard.Router

  scope "/" do
    pipe_through :browser
    live_dashboard "/dashboard", metrics: AuthWeb.Telemetry
  end
end

if Mix.env() == :dev do
  # If using Phoenix
  forward "/sent_emails", Bamboo.SentEmailViewerPlug
end
...
...
The SentEmailViewerPlug is what will display emails when running in development.
Now we need to create a simple Bamboo mailer module.
Terminal
touch lib/auth/mailer.ex/lib/auth/mailer.ex
defmodule Auth.Mailer do
  use Bamboo.Mailer, otp_app: :auth
end
Nothing complicated, this is right from the Bamboo documentation.
Finally, we can replace the existing user_notifier.ex code with the below.
/lib/auth/accounts/user_notifier.ex
defmodule Auth.Accounts.UserNotifier do
  import Bamboo.Email
  alias Auth.Mailer

  @from_address "that-auth-app@example.com"

  defp deliver(to, subject, text_body, html_body) do
    email =
      new_email(
        to: to,
        from: @from_address,
        subject: subject,
        text_body: text_body,
        html_body: html_body
      )
      |> Mailer.deliver_now()

    {:ok, email}
  end

  @doc """
  Deliver instructions to confirm account.
  """
  def deliver_confirmation_instructions(user, url) do
    text_body = """

    ==============================

    Hi #{user.email},

    You can confirm your account by visiting the url below:

    #{url}

    If you didn't create an account with us, please ignore this.

    ==============================
    """

    html_body = """
    Hi #{user.email},<br/></br/>
    You can confirm your account by visiting the url below:<br/></br/>
    <a href="#{url}" target="_blank">#{url}</a><br/></br/>
    If you didn't create an account with us, please ignore this.
    """

    deliver(user.email, "Please confirm your account", text_body, html_body)
  end

  @doc """
  Deliver instructions to reset password account.
  """
  def deliver_reset_password_instructions(user, url) do
    text_body = """

    ==============================

    Hi #{user.email},

    You can reset your password by visiting the url below:

    #{url}

    If you didn't request this change, please ignore this.

    ==============================
    """

    html_body = """
    Hi #{user.email},<br/></br/>
    You can reset your password by visiting the url below:<br/></br/>
    <a href="#{url}" target="_blank">#{url}</a><br/></br/>
    If you didn't request this change, please ignore this.
    """

    deliver(user.email, "Please confirm your account", text_body, html_body)
  end

  @doc """
  Deliver instructions to update your e-mail.
  """
  def deliver_update_email_instructions(user, url) do
    text_body = """

    ==============================

    Hi #{user.email},

    You can change your e-mail by visiting the url below:

    #{url}

    If you didn't request this change, please ignore this.

    ==============================
    """

    html_body = """
    Hi #{user.email},<br/></br/>
    You can change your e-mail by visiting the url below:<br/></br/>
    <a href="#{url}" target="_blank">#{url}</a><br/></br/>
    If you didn't request this change, please ignore this.
    """

    deliver(user.email, "Please confirm your account", text_body, html_body)
  end
end
This code is pretty simple, just consisting of text and html email templates which get sent via Bamboo in the deliver function.
Now we can navigate to http://localhost:4000/sent_emails to see any emails that are being sent.
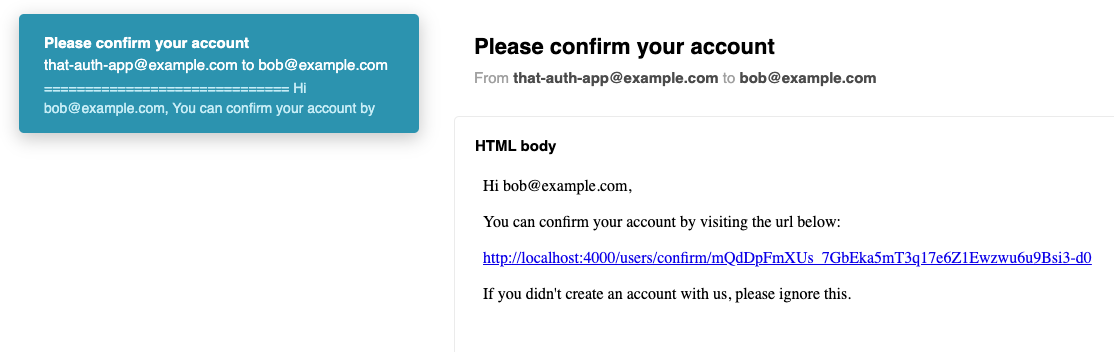
Scrolling down you’ll see the text version:

So our notifications are all good!
If you run the tests however, you’ll notice a number of failures. This is due to a function in accounts_fixtures.ex which is used to extract tokens from the body of the notifications.
For example there is a test that ensures the user can be retrieved based on a reset password token, the set-up of this test extracts the token like so:
/test/auth/accounts_test.exs
The structure of the notifications has changed slightly with the updates we made to user_notifier.ex. As a result we need to update the fixture code.
/test/support/fixtures/accounts_fixtures.ex
def extract_user_token(fun) do
  {:ok, captured} = fun.(&"[TOKEN]#{&1}[TOKEN]")
  # [_, token, _] = String.split(captured.body, "[TOKEN]")
  [_, token, _] = String.split(captured.text_body, "[TOKEN]")
  token
end
We’ve just swapped out captured.body for captured.text_body as that is now the key we’re using in user_notifier.ex.
And that does it! All our planned functionality has been implemented and our tests are passing.
A few things to be mindful of
There are a few things to be mindful of when it comes to the customizations we’ve made.
Email discovery
We’ve opened up the potential for email discovery since we now present different messages on unsuccessful login attempts.
For instance the message we display for a non-confirmed user is different than what we display if an incorrect email or password is entered. In theory this means it’s possible for someone to find the email of users in our system who have registered but not yet confirmed their account (the same applies to blocked users). One could use a web scrapper or the like to hit the login page with a bunch of random emails and make note of any emails that displayed the “Please confirm your email before signing in…” message.
Multiple confirmation emails
Since we re-send the confirmation email when someone attempts to log in prior to confirming their account, we could in theory have a user repeatedly log in without confirming their account and potentially spam someone with email (not to mention run up the amount of emails we’re sending thru our chosen email service). For instance if I register with an email other than my own and then keep attempting to log in, whoever actually owns that email account is going to get a bunch of confirmation emails.
I think the benefits of presenting useful error messaging and re-sending the confirmation email outweighs the potential downsides but both these issues are something to be aware of.
Summary
That’s it for our walkthru of Phx.Gen.Auth, it’s great to have another authentication option available for Phoenix, options are always good!
Thanks for reading and I hope you enjoyed the post!