Tailwind has emerged as a compelling utility first alternative to typical CSS frameworks such as Bootstrap. Although it took a little getting used to, I find myself regularily reaching for Tailwind these days and wanted to document the steps I use for setting it up in a new Phoenix project.
Updated 2022-04-24:
There is now an official mix task for getting Tailwind setup… it works great, and the instructions in the GitHub repo are simple to follow and understand… so I’d suggest using the official mix task: https://github.com/phoenixframework/tailwind.
Updated 2021-11-05:
These instructions aren’t really relevant anymore as Phoenix 1.6 now uses esbuild. Also using the Tailwind JIT mode is likely the preferable Tailwind setup.
Luckily Mike Clark has an updated blog post on how to add Tailwind to Phoenix 1.6.
Even better there is a hex package that does everything for you. It’s what I use now and it works great! You just add the package to your mix file and run mix phx.gen.tailwind, how easy is that!
So unless you are on an earlier version of Phoenix I suggest you stop reading now and check out the GitHub repository for the hex package: https://github.com/kevinlang/phx_gen_tailwind.
If you are on a version of Phoenix prior to 1.6 and not concerned about running Tailwind in JIT mode…
Before we get started I want to mention I’ve based this post largely on the excellent Tailwind and Phoenix post written by Mike Clark at The Pragmatic Studio. When Version 2 of Tailwind came out I used Mike’s post which dealt with version 1 of Tailwind in combination with the tailwind docs to get things going. I had some rough notes that I planned to turn into a blog post but then Mike updated his post to reflect v2 of Tailwind and I didn’t feel there was much point to finishing my own post. I have found myself going back to my notes on the regular however and as I partly use my blog as a self reference I decided to go ahead and throw up this post.
I strongly suggest giving Mike’s post a read. It goes into some really interesting background and details around webpack and PostCSS. In general I highly recommend the content from The Pragmatic Studio. They have a fantastic LiveView course, and the first 18 lessons are completely free! What’s not to like about that!
Anyway… let’s get at it!
Getting started
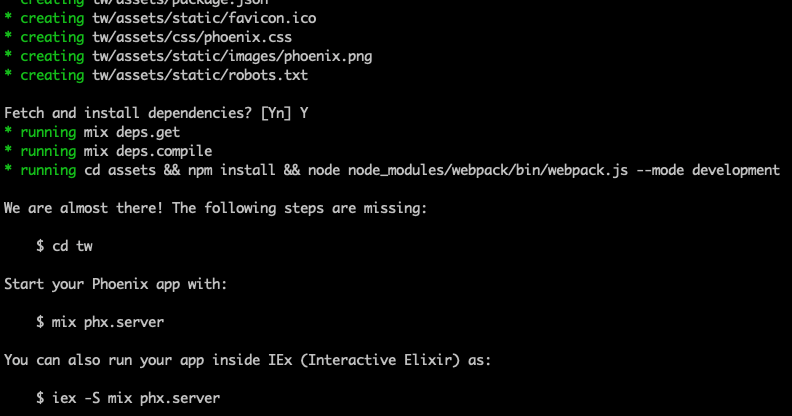
We’ll start off by creating a new Phoenix application. I’m using version 1.5 of Phoenix, if you’re using version 1.4 or earlier the steps in this post likely won’t work out of the box. Also note that although we’re creating a LiveView application, the exact same approach applies for adding Tailwind to a traditional Phoenix application. We have no need for a database today so "no-ecto" is the word of the day.
Terminal
mix phx.new tw --live --no-ectoChoose Y when asked to fetch and install dependencies.
Now we’ll navigate to the application directory and tackle adding Tailwind.
Terminal
cd twInstalling Tailwind
Adding the npm packages
Our first step is to install the necessary components via npm. We will need tailwindcss, postcss, postcss-loader 4.2, postcss-import and autoprefixer.
Terminal
npm install tailwindcss postcss postcss-loader@4.2 postcss-import autoprefixer --prefix assets --save-dev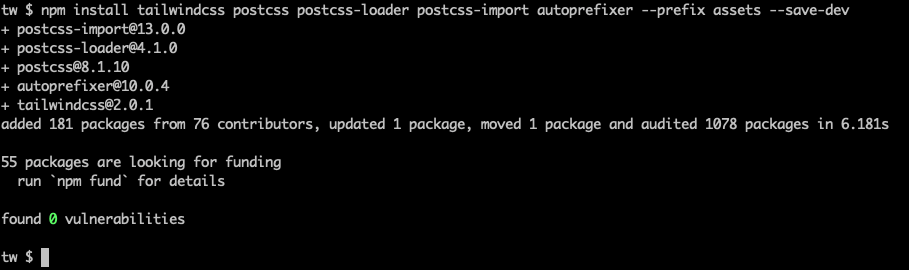
Next we’ll configure PostCSS.
Configure PostCSS
We need a new config file in the assets directory.
Terminal
touch assets/postcss.config.js… with the following contents.
/assets/postcss.config.js
module.exports = {
  plugins: {
    "postcss-import": {},
    tailwindcss: {},
    autoprefixer: {}
  }
}
postcss-import is going to be used to inline any Tailwind components we create (which we’ll discuss later), while tailwindcss and autoprefixer handles Tailwind and vendor prefixes respectively.
Time to configure webpack to use PostCSS.
Configure webpack
Phoenix itself uses webpack to bundle assets so a webpack.config.js file already exists in the assets directory. We just need to update the rules section for CSS to include postcss-loader. Note this also needs to be placed between css-loader and sass-loader.
/assets/webpack.config.js …line 37
{
  test: /\.[s]?css$/,
  use: [
    MiniCssExtractPlugin.loader,
    'css-loader',
    'postcss-loader',
    'sass-loader',
  ],
}
Include Tailwind and remove the default CSS
Finally we need to include the tailwind directives in app.scss… and we can remove the existing styles.
The resulting file will look like:
/assets/css/app.scss
@import "tailwindcss/base";
@import "tailwindcss/components";
@import "tailwindcss/utilities";
We’re no longer using phoenix.css so we can trash it.
Terminal
rm assets/css/phoenix.cssOur final step is to configure the removal of unused CSS for production builds.
Purge CSS for production
When running in development mode, the full Tailwind CSS styles will be included in our generated CSS file. This is great as it allows us to use any Tailwind style we want without a bunch of imports or other rigmarole. However in Production we don’t want unused CSS bloating our site.
Luckily it is easy to configure Tailwind to purge CSS.
First we’ll create a Tailwind config file.
Terminal
cd assets && npx tailwindcss init && cd ..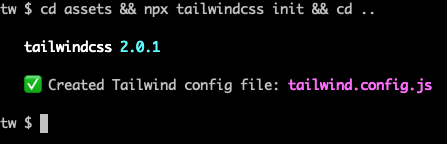
And now we just need to configure the purge paths.
/assets/tailwind.config.js
module.exports = {
  purge: [
    "../**/*.html.eex",
    "../**/*.html.leex",
    "../**/views/**/*.ex",
    "../**/live/**/*.ex",
    "./js/**/*.js"
  ],
  ...
  ...
And that’s it, we’re ready for a test run.
Testing it out
Let’s replace the default page_live content with some tailwind styled content.
/lib/tw_web/live/page_live.html.leex
<h1 class="text-indigo-500 text-3xl font-bold ml-9">Hello there I should be indigo!</h1>Now we’ll fire up the server.
Terminal
mix phx.serverAnd we should see our styled text.
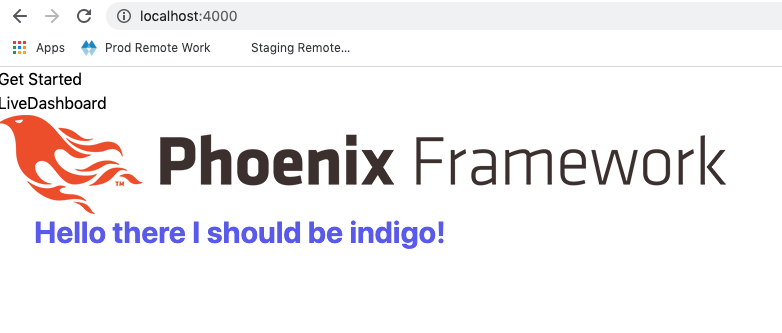
Perfect!
We’ll also want to adjust the contents of the three files at /lib/tw_web/templates/layout.
The root.html.leex file contains the navigation markdown for both live and standard template files. Notice it contains a section tag with a container class.
/lib/tw_web/templates/layout/root.html.leex
Likewise live.html.leex and app.html.eex contain root tags with a container class.
/lib/tw_web/templates/layout/live.html.leex
/lib/tw_web/templates/layout/app.html.eex
Turns out Tailwind has a container class which acts on the max-width of an element. What we’ll find is if we don’t replace / remove the container classes, some unexpected padding and other issues will crop up depending on the current screen size. For instance, replacing the current contents of page_live with some HTML from the Tailwind UI component library:
So we want to remove the container class from root.html.leex, live.html.leex, and app.html.eex:
/lib/tw_web/templates/layout/root.html.leex
...
...
<body>
  <header>
    <!-- <section class="container"> -->
    <section>
      ...
      ...
Likewise live.html.leex and app.html.eex contain root tags with a container class.
/lib/tw_web/templates/layout/live.html.leex
<!-- <main role="main" class="container"> -->
<main role="main">
  ...
  ...
/lib/tw_web/templates/layout/app.html.eex
<!-- <main role="main" class="container"> -->
<main role="main">
  ...
  ...
By removing the container class in live.html.leex everything looks good and is full width (obviously we’d also need to remove / update the default Phoenix Framework header markdown in root.html.leex in a real implementation).
Finally, let’s have a quick look at how to handle components.
Components
With a utility first CSS framework your markup can end up with a lot of CSS classes and you might find yourself repeating things on a regular basis. The recommended approach for dealing with this is to extract common elements to components https://tailwindcss.com/docs/extracting-components.
Let’s have a quick look at how we could create a common set of styles to use with a button.
We’ll create a buttons component file.
Terminal
mkdir assets/css/components
touch assets/css/components/buttons.css
And then create a "primary" button class.
/assets/css/components/buttons.css
@tailwind base;
@tailwind components;
@tailwind utilities;

@layer components {
  .btn-primary {
    @apply py-2 px-4 bg-green-500 text-white font-semibold rounded-lg shadow-md hover:bg-green-700 focus:outline-none focus:ring-2 focus:ring-green-400 focus:ring-opacity-75;
  }
}
We’ve applied the desired styles and wrapped them in Tailwind’s layer directive.
Now we need to reference the component file in our main app.scss file.
/assets/css/app.scss
@import "tailwindcss/base";
@import "tailwindcss/components";
@import "tailwindcss/utilities";

@import "./components/buttons.css";
And with that we have access to our button!
/lib/tw_web/live/page_live.html.leex
<p class="text-indigo-500 text-3xl font-bold ml-9">Hello there I should be indigo!</h1>
<button class="btn-primary ml-9">Some button</button>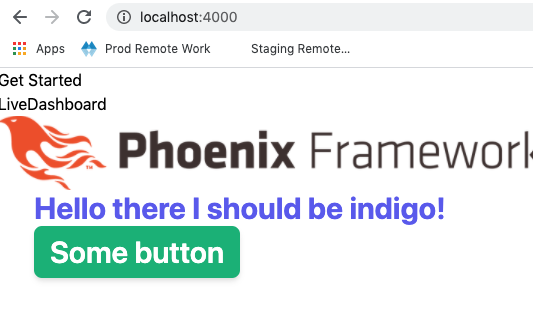
So that’s it for Tailwind itself… but if you’re using Tailwind in Phoenix, you’ll likely also want to add Alpine.
In the case of Liveview there are a few extra steps to getting Alpine working with Phoenix, so we’ll run thru doing so below.
Adding Alpine
Alpine will give us a convenient way of manipulating UI elements that aren’t related to data such as drop menus. We could control all our UI elements via LiveView but this can lead to an underseriable user experience as latency issues are going to result in the UI getting choppy.
The Alpine set-up below is taken from an excellent blog post by Patrick Thompson. I recommend reading all the Patrick Thompson posts, they are very detailed and do an absolutely fantastic job of explaining how to combine LiveView and Alpine.
In any case, the first step is to install Alpine.
Terminal
npm install alpinejs --prefix assets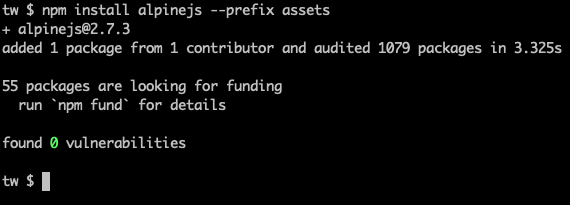
To integrate with LiveView a few additions are required in app.js.
/assets/js/app.js
...
import 'alpinejs';

let csrfToken = document.querySelector("meta[name='csrf-token']").getAttribute("content");
let liveSocket = new LiveSocket("/live", Socket, {
  dom: {
    onBeforeElUpdated(from, to) {
      if (from.__x) {
        window.Alpine.clone(from.__x, to);
      }
    },
  },
  params: {_csrf_token: csrfToken}
});
...
We’ve added an alpinejs import to…. import the library. Further we’ve added a dom property to the liveSocket definition which is what allows LiveView and Alpine to play nicely.
Simple!
Summary
Tailwind provides an interesting alternative to component based CSS frameworks such as Bootstrap; it’s worth exploring if you haven’t already.
I’d also highly recommend the Tailwind UI component library. I’ve purchased a license myself and it provides an impressive set of components… and is also a great way to support the development of Tailwind itself.
Thanks for reading and I hope you enjoyed the post!