In Part 4 we concentrated on the styling of individual posts. We’re getting close to being done with our blog, we just need to add some content for our archive and about pages. We’ll also add a custom 404 page.
I’d encourage you to follow along, but if you want to skip directly to the code, it’s available on GitHub at: https://github.com/riebeekn/jekyll-bootstrap-4-starter.
Getting started
If you followed along with part 4 just continue on with the code you created in part 4. If not and you’d rather jump right into part 5, you can use a clone of part 4 as a starting point.
Clone the Repo
If grabbing the code from GitHub instead of continuing along from part 4, the first step is to clone the repo.
Terminal
git clone -b part-04 https://github.com/riebeekn/jekyll-bootstrap-4-starter.git
cd jekyll-bootstrap-4-starter
What we’re starting with
OK, you’ve either gotten the code from GitHub or are using the existing code you created in Part 4, let’s see where we’re starting from.
Terminal
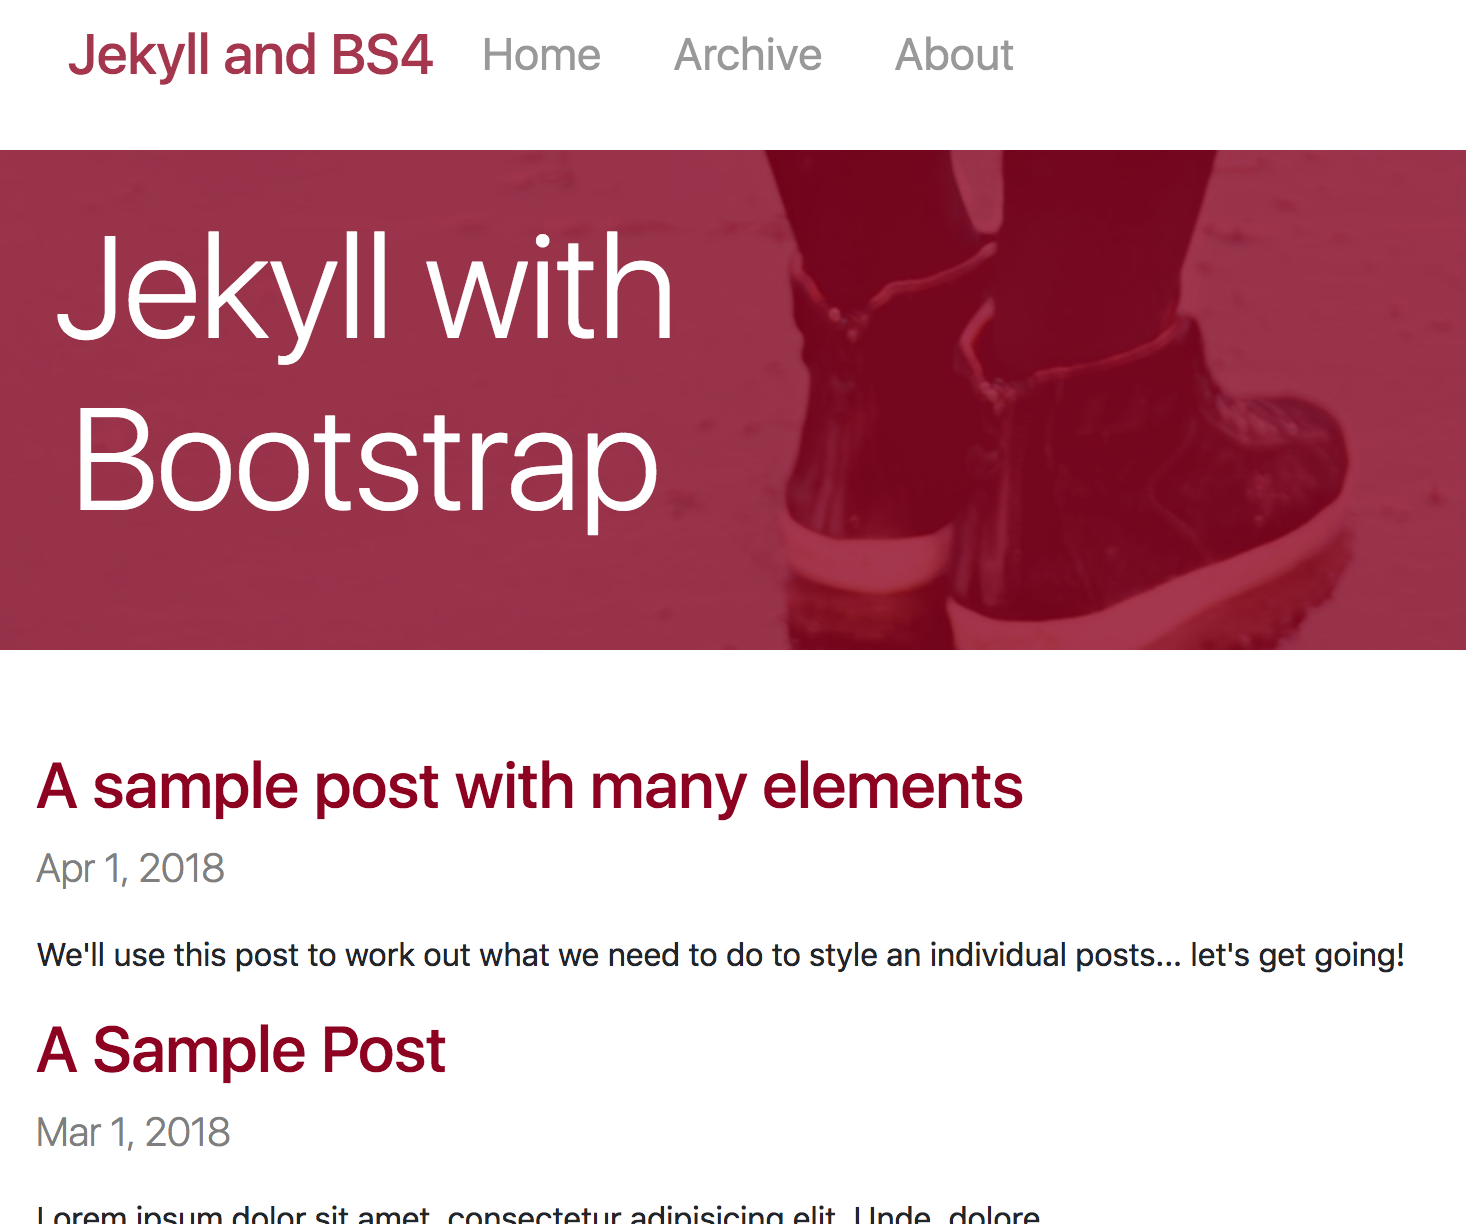
jekyll serve --livereloadIf you navigate to http://localhost:4000/ you’ll see where we left off last time.
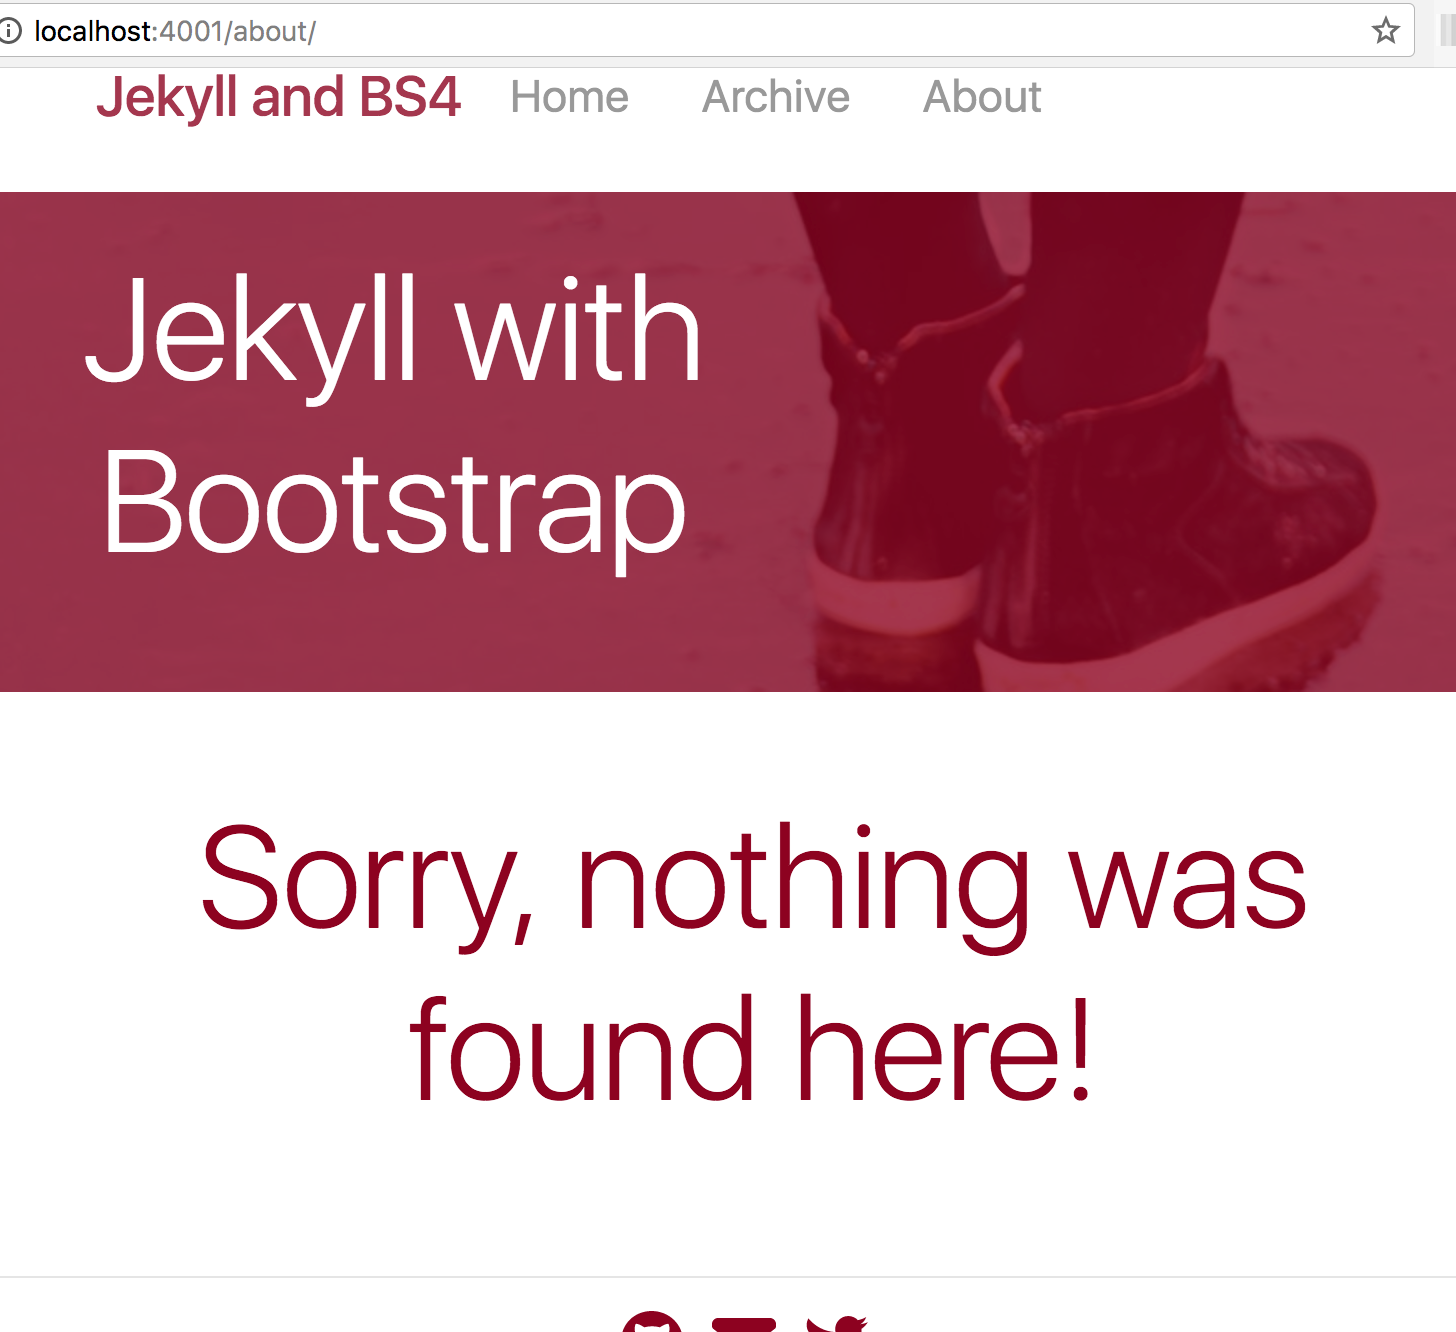
Looking good, let’s see how our about page is looking. Navigate to http://localhost:4000/about and you’ll see that we get a nasty looking error page.

So let’s take care of our 404 situation first.
Creating a custom 404 page
Creating a custom 404 in Jekyll is very straight-forward. First create a file for our 404 content.
Terminal
touch 404.htmlAnd then fill in the content.
/404.html
---
layout: default
title: Not found
permalink: /404.html
---
<div class="container">
  <div class="row">
    <div class="col pt-5">
      <h1 class="display-3 text-primary text-center">Sorry, nothing was found here!</h1>
    </div>
  </div>
</div>
You’ll need to restart the Jekyll server after adding the custom 404 page for it to show up. After doing so we have a much better looking 404 page.
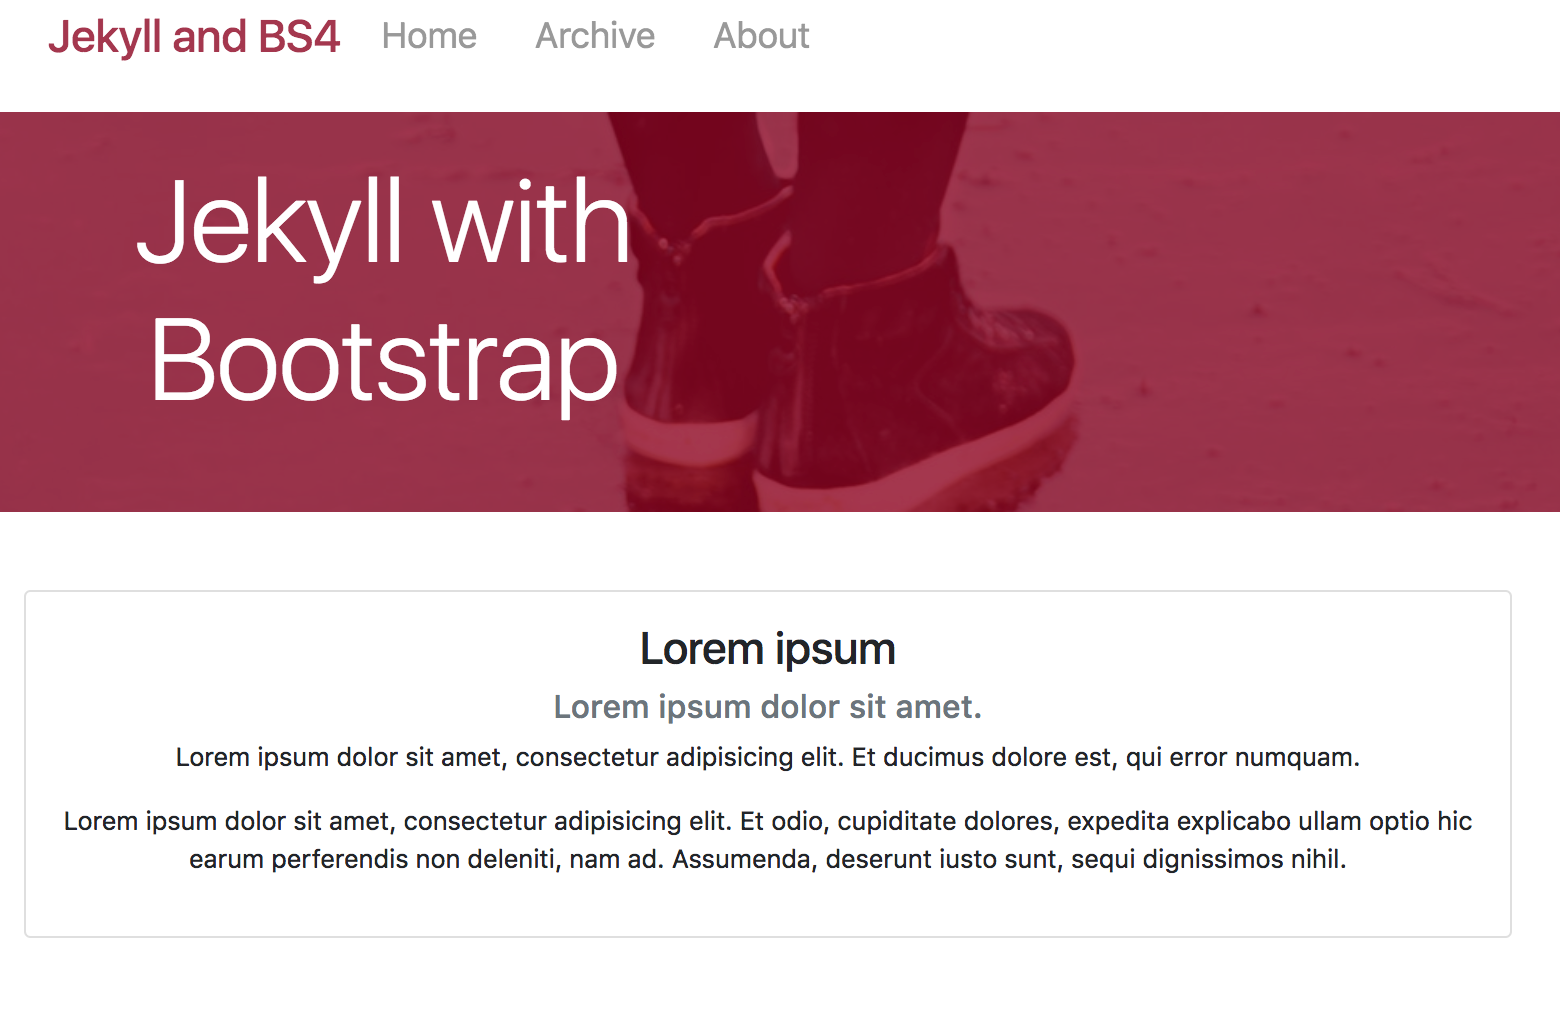
About page
That’s fantastic that we now have a decent looking 404 page, but we want an actual about page when we navigate to /about. We’re going to add a very minimal page with some default Lorem ipsum text.
Terminal
touch about.html/about.html
---
layout: default
title: About
permalink: /about/
---
<section class="text-center py-5">
    <div class="container">
      <div class="row">
        <div class="col">
          <div class="card">
            <div class="card-body">
              <h3>Lorem ipsum</h3>
              <h5 class="text-muted">Lorem ipsum dolor sit amet.</h5>
              <p>
                Lorem ipsum dolor sit amet, consectetur adipisicing elit. Et ducimus dolore est, qui error numquam.
              </p>
              <p>
                Lorem ipsum dolor sit amet, consectetur adipisicing elit. Et odio, cupiditate dolores, expedita explicabo ullam optio hic earum perferendis non deleniti, nam ad. Assumenda, deserunt iusto sunt, sequi dignissimos nihil.
              </p>
            </div>
          </div>
        </div>
      </div>
    </div>
  </div>
</section>
This provides a very basic about page placeholder.
Archive
The final bit of functionality is the archive page. This will simply be a chronological list of all the individual blog posts.
Similar to index.html, we’ll create a bare bones page that will render out to an _include.
Let’s start with the main archive page.
Terminal
touch archive.html/archive.html
---
layout: default
title: Archive
permalink: /archive/
---

{% include archive.html %}
Just like our index page, not much is going on here, we’re just rendering the appropriate include page.
Let’s create that next.
Terminal
touch _includes/archive.html/includes/archive.html
<section id="archive">
  <div class="container py-3">
    <div class="row">
      <div class="col">
        <h2 class="text-primary">Archive</h2>
        <ul>
          {% for post in site.posts %}
            <li>
              <span>{{ post.date | date: "%b %d, %Y" }}</span> -
              <a href="{{ post.url | prepend: site.baseurl }}">{{ post.title }}</a>
            </li>
          {% endfor %}
        </ul>
      </div>
    </div>
  </div>
</section>
Nothing tricky going on here, just some simple Bootstrap classes and an unordered list in which we iterate thru and display all our blog posts.
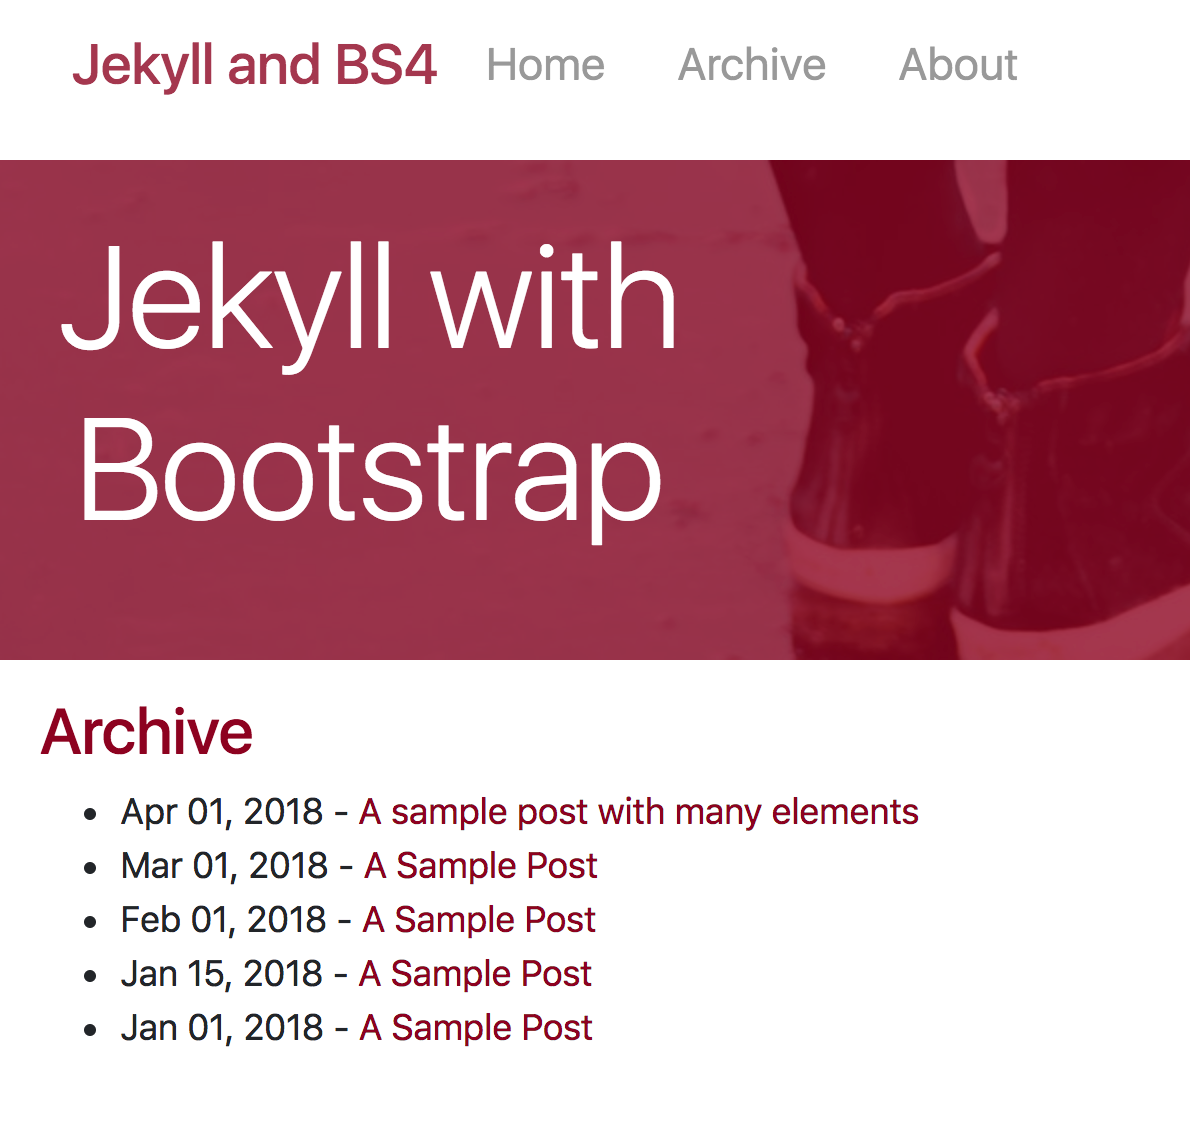
If you navigate to http://localhost:4001/archive/ you’ll see our archive of posts.
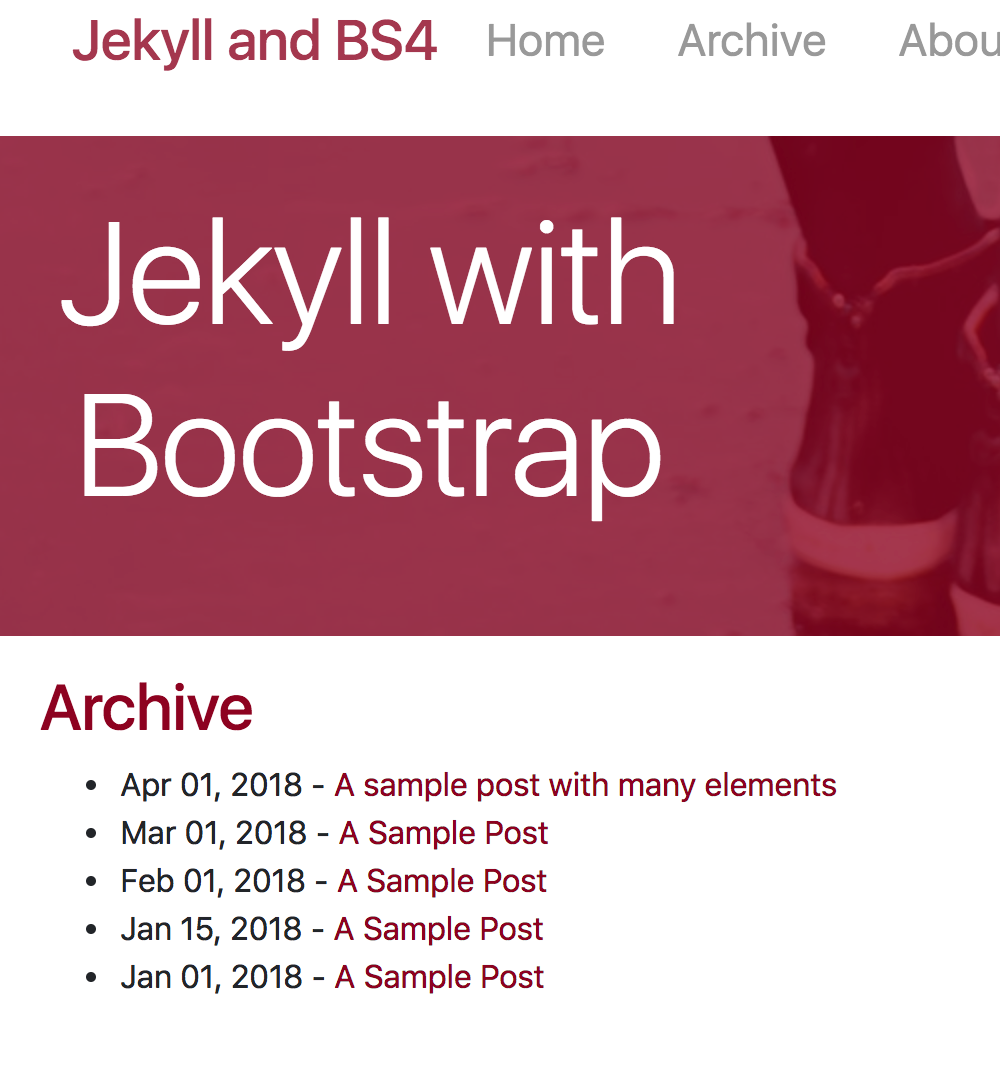
Not bad, let’s add a little bit of styling.
Terminal
touch css/custom/includes/_archive.scssDon’t forget to add the new file to main.scss.
/css/main.scss
---
---

@import 'bootstrap/bootstrap';
@import 'custom/includes/header';
@import 'custom/includes/banner';
@import 'custom/includes/social_links';
@import 'custom/includes/posts';
@import 'custom/includes/pagination';
@import 'custom/includes/post';
@import 'solarized-dark';
@import 'custom/includes/archive';
And now for the styling.
/css/custom/includes/_archive.scss
#archive {
  a {
    text-decoration: none;
    border: none;
    &:hover {
      color: $info;
    }
  }
  li {
    font-size: 18px;
  }
}
Just a few minor changes, we’ve slightly increased the font size, removed the underline from hovered links and also used our standard $info color for hovered links.
Looking good!
That does it for our Blog!
A note on _posts file names
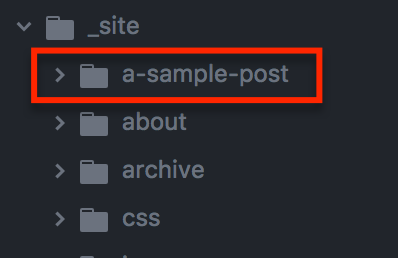
One thing you’ll notice is all our blog post links currently display the content for post 2018-04-01-a-sample-post.md. For instance from either the archive or index page clicking any of the “A Sample Post” links yields the content for 2018-04-01-a-sample-post.md instead of the Lorem ipsum text for the sample posts.
Why is this? Well Jekyll is creating our posts based on the post title exclusive of the post date. Since all our posts are named <date>-a-sample-post.md, Jekyll is going thru our posts chronologically and creating the same file for each of our posts, over-writing the previously generated content. Since 2018-04-01-a-sample-post.md is our last post, this is the content that will appear.
You can see this in the _site folder, we have just a single post.
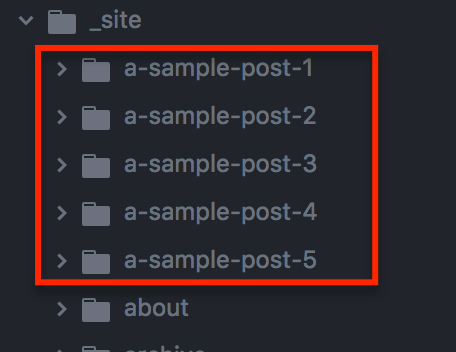
Obviously with real posts, you’d be using unique titles for them so this would not be an issue, we can rename our sample posts to see them show up as seperate files in our _site directory and as unique links in the index and archive pages.
Terminal
mv _posts/2018-01-01-a-sample-post.md _posts/2018-01-01-a-sample-post-1.md
mv _posts/2018-01-15-a-sample-post.md _posts/2018-01-15-a-sample-post-2.md
mv _posts/2018-02-01-a-sample-post.md _posts/2018-02-01-a-sample-post-3.md
mv _posts/2018-03-01-a-sample-post.md _posts/2018-03-01-a-sample-post-4.md
mv _posts/2018-04-01-a-sample-post.md _posts/2018-04-01-a-sample-post-5.md
We now see unique posts showing up in our _sites directory.
A few quick notes on deployment
We’re not going to go over deployment in detail, but like any static site there are many options available. Essentially all that is required is to move all the files in the _site directory to your server.
The option I’ve favored is deploying to Amazon S3. This is a very economical and easy solution.
I use s3_website to manage deployments, and I’ve found the following is a great guide for getting everything set up: https://simpleit.rocks/redirect-http-to-https-and-www-to-non-www-with-aws-s3-bucket-cloudfront-route-53-and-a-custom-domain/
Summary
We’ve got a pretty solid Blog set up at this point and Jekyll made it pretty easy to put together.
In general Jekyll offers a great solution for creating any sort of static web site, not just Blogs. The use of layouts and include files encourages us to structure our site in a logical manner and avoid code duplication. Being able to use a combination of Markdown, HTML, and Liquid syntax is great too and gives a good amount more flexibility than just a plain old HTML site.
Thanks for reading and I hope you enjoyed this series of posts!